
OneSuite records the hours you work against a project, either with a running timer or by typing the time in afterwards. Your tracked billable hours are what client invoices are built from, so logging them from day one keeps billing accurate.
In this guide you’ll learn how to:
- Start, pause and stop a timer from the top bar
- Type in time with Add Time or the Week grid
- Stay within the time limits for an entry
- Submit your week for approval
Before you start
- If you don’t see Timesheet in the sidebar, an admin can switch it on in Settings, Customize Navigation.
- You must be assigned to the project you want to log time to.
- If a project offers work types, every entry on it needs one. Set them up early with How to Set Up Work Types.
How to track time with the timer
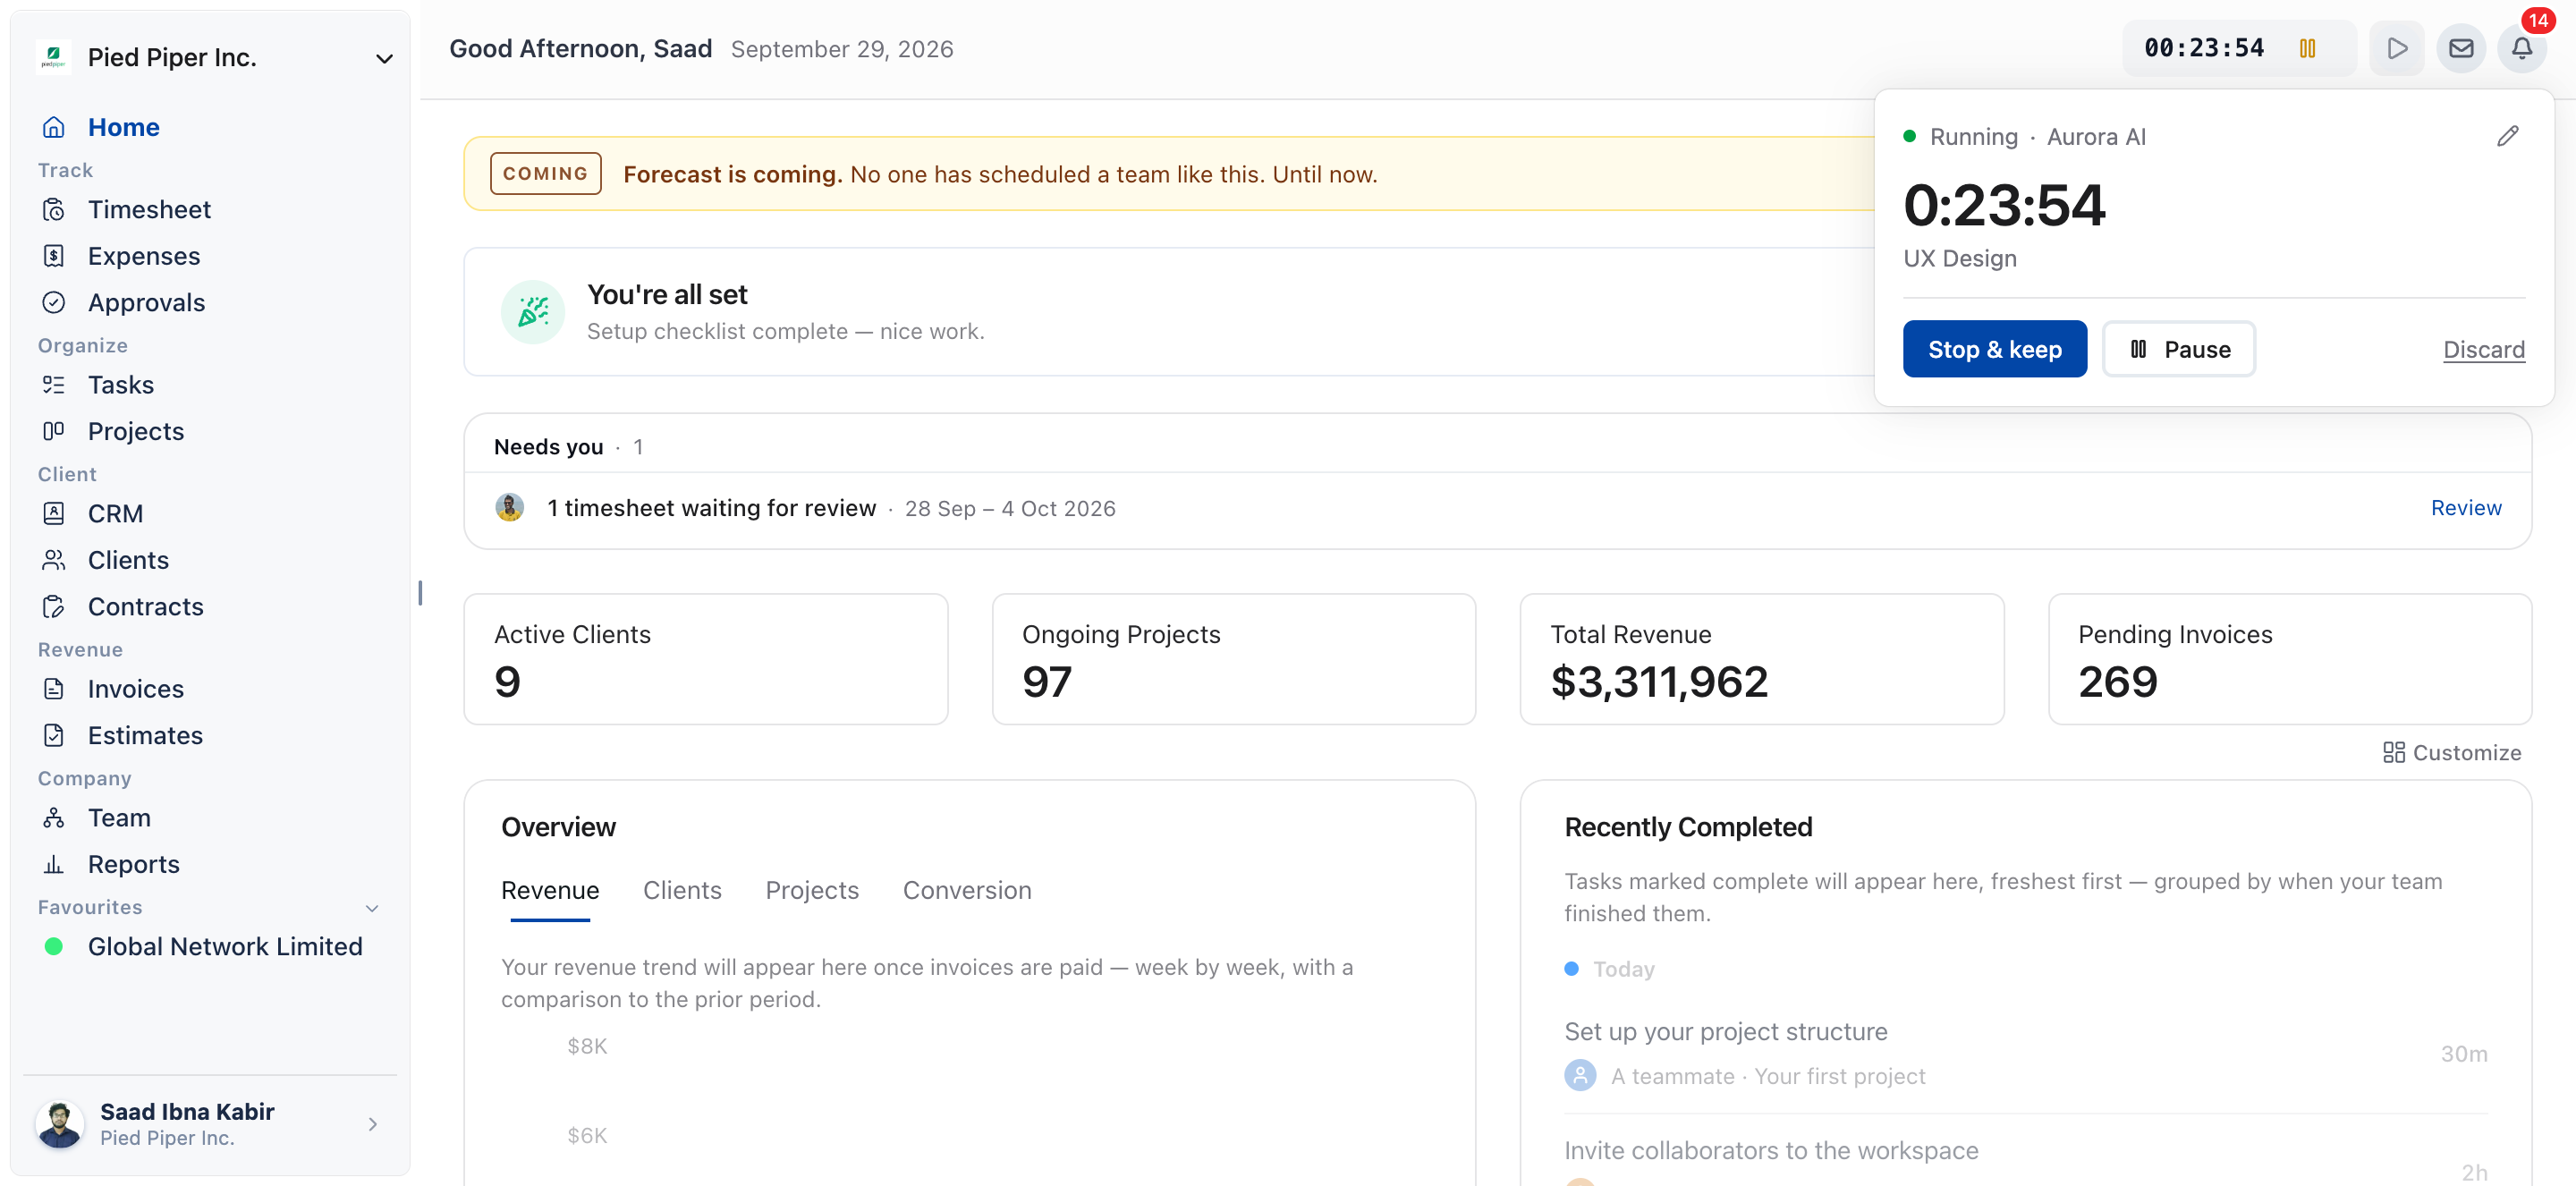
Use the timer icon in the top bar to time work as you do it, then keep the time as an entry.
- Click the timer icon in the top bar.
- Under Start timer, choose the project, then the work type and task. A project is required.
- Click Start.
- Click Pause to take a break and Resume to carry on.
- Click Stop & keep to save the time as an entry, or Discard to delete it.
Only one timer runs at a time. A running timer stops at 8 hours, and you then choose Stop & keep or Discard before you can start another.
How to type in time you already worked
Click Add Time at the top of the Timesheet page to log time after the fact.
- Click Timesheet in the sidebar, then Add Time.
- Choose the project.
- Choose a work type if the project offers them, then a task.
- Type a note in What are you working on?
- Enter the duration.
- Click Save entry.
To fill in a whole week at once, open the Week view, click Add row, choose the project, work type and task, click Save row, and type the hours into each day’s cell.
What are the time limits for an entry?
An entry you type in must be at least 2 minutes long, and no entry can be longer than 24 hours.
| Limit | Value |
|---|---|
| Shortest entry you type in | 2 minutes |
| Longest entry | 24 hours. Split longer work across the days it was done. |
| Running timer | Stops at 8 hours. You then keep or discard it. |
How to submit your week for approval
If your business uses timesheet approvals, you send the finished week to your approver with one button.
- Stop any running timer.
- Click Submit week for approval on the Timesheet page.
The week then shows Pending approval, and Approved once a reviewer signs it off. If your business doesn’t use approvals, the button doesn’t appear and there is nothing to submit.
Not using OneSuite yet? Start your free trial →
FAQs
What is the minimum time entry in OneSuite?
An entry you type in must be at least 2 minutes long. Anything shorter is refused with An entry has to be at least 2 minutes long.
Does the OneSuite timer stop on its own?
Yes, a running timer stops at 8 hours. You then choose Stop & keep to save the time or Discard to delete it.
Why do I have to pick a work type?
The project offers work types, and if a project offers work types, every entry on it needs one. On a project with no work types, you can skip the choice.
Why can’t I see the Submit week for approval button?
The button appears only when your business uses timesheet approvals. Without approvals, your tracked time needs no submission.
Can I just track my hours in a spreadsheet instead?
You can, but hours in a spreadsheet never reach approvals, project budgets or invoices. Time logged in OneSuite flows straight into the project and the invoice wizard, so nothing is retyped.
What to do next
Learn every timesheet view: Go further with timers, copying rows and fixing sent-back time in Time Tracking in OneSuite.
Set up work types: Give each entry the right label and rate with How to Set Up Work Types.
Bill your hours: Turn tracked time into a sent invoice with Sending Your First Invoice.