OneSuite includes a Notion-like rich text editor that makes writing and formatting documents simple and intuitive. You can create contracts, proposals, NDAs, or any custom document directly within your workspace—then send it for signatures in just a few steps.
Start a New Document #
Starting a document in OneSuite is simple and familiar, especially if you’ve used editors like Notion.
- Go to the Documents module: From the left sidebar, click Document V2 to access your Document Home.
- Click “Start from blank”: This opens the OneSuite document editor where you can begin writing.
- Enter a document title: At the top, give your document a name (e.g., “Freelance Agreement”).
- Select a document type: Use the dropdown next to the title to choose the appropriate type (Proposal, NDA, Contract, etc.). (You can manage these options via the “Customize” button on the main dashboard.)
- Link to a project (optional): Use the Project selector in the top-right to associate this document with a client project.
- Select recipients (optional): As you add parties, you can select existing contacts from your OneSuite Clients, Leads, or Team database.
Don’t see the person? Click Create new to manually add them. - Start writing your document: Now start writing your document.
- Type freely using the editor
- Press
/to insert content blocks (headings, lists, tables, etc.) - Use the formatting toolbar to style your content
Insert Blocks with “/” Command #
In OneSuite’s editor, typing / opens a quick-insert menu that lets you add content blocks without using the toolbar. This is especially useful for building documents faster with consistent formatting.
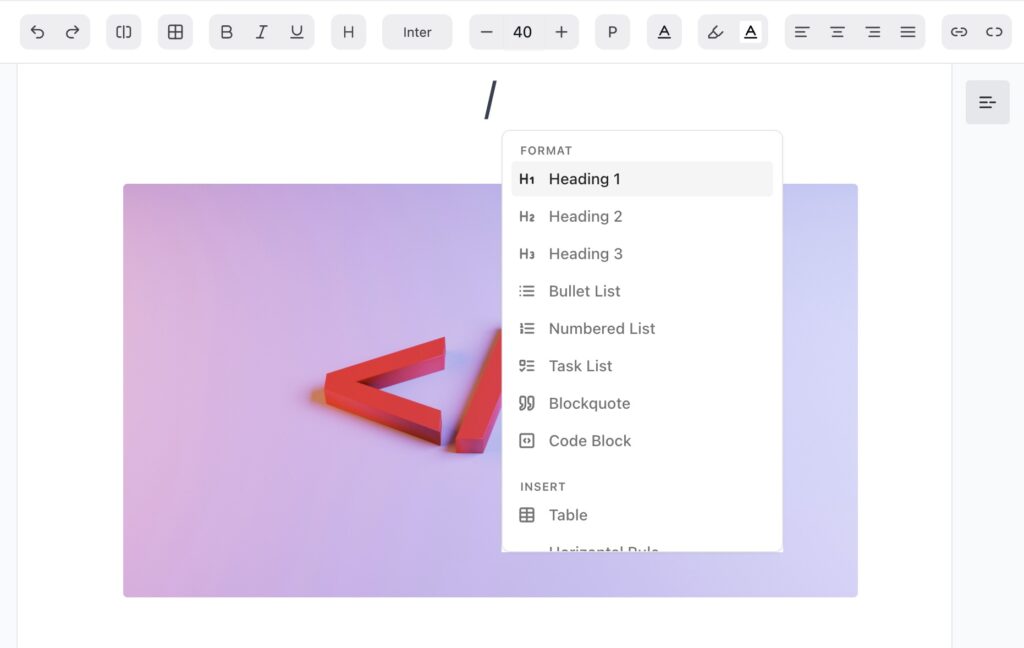
Available Blocks
✓ Heading 1 — Large section titles
✓ Heading 2 — Subheadings for structure
✓ Heading 3 — Smaller sub-sections
✓ Bullet List — For general item lists
✓ Numbered List — For ordered steps
✓ Task List — Interactive checkboxes (to-dos or approval items)
✓ Blockquote — For highlighting text or key statements
✓ Code Block — Display formatted code or technical notes
✓ Table — Add simple structured tables
✓ Horizontal Rule — Divider line between sections
Formatting Options #
The OneSuite editor includes all the essential formatting tools you need to make your documents look clean, professional, and easy to read.
Text Styles
Use the toolbar at the top of the editor to apply standard text formatting:
✓ Headings: Heading 1, Heading 2, Heading 3
✓ Text styles: Bold, Italic, Underline, Strikethrough
✓ Alignment: Align text to Left, Center, or Right
Lists
Add different types of lists to structure your content:
✓ Bullet List: For grouped items
✓ Numbered List: For steps or sequences
✓ Task List: Checkbox-style list, ideal for to-dos or action points
Quotes and Dividers
✓ Blockquote: Highlight important notes, statements, or quotes
✓ Horizontal Rule (Divider): Visually separate sections of your document
Links
✓ Insert Link: Highlight any text, click the link icon, and paste the URL
Add Rich Content #
You can insert additional elements to enhance your document:
Add an Image
- Click the image icon in the toolbar.
Add a Link
- Highlight any text and click the 🔗 icon
- Add your link and press enter.
- To remove a link, similarly highlight the linked text and press
Insert a Table
- Type
/tableto insert a basic table - Use the inline menu to add/remove rows or columns
Add a Code Block
- Type
/code blockfor multi-line technical content - For inline code, use the three-dot menu
Use Advanced Block Options #
Click the three-dot menu in the toolbar to insert:
- Divider
- Task list
- Superscript / Subscript
- Strike
- Code (inline)
- Code block
- Quote
Other Options #
In addition to writing and formatting your document, OneSuite provides helpful tools for version control, export, and record-keeping.
Download PDF
✓ Download your document anytime by clicking the three-dot menu (⋯) in the top-right corner of the editor.
This saves a PDF version of the current document — whether it’s a draft or signed copy.
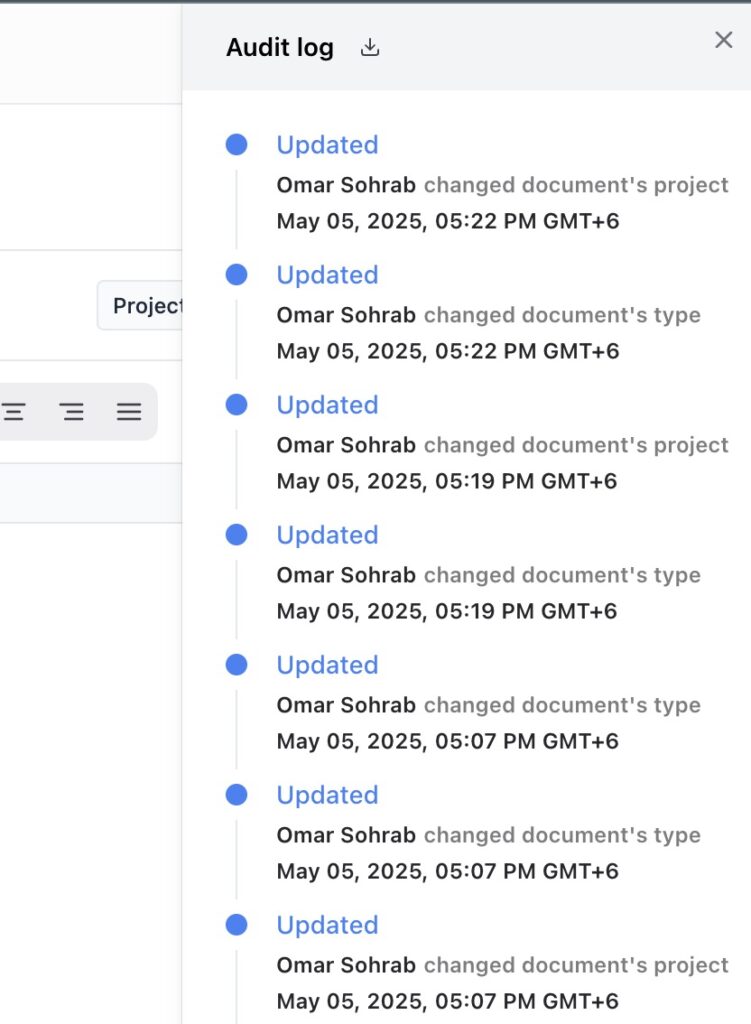
View Audit Log
✓ Track every activity on the document using the Audit Log (also under the ⋯ menu).
You’ll see who created, edited, shared, viewed, or signed the document—helpful for compliance and internal review.
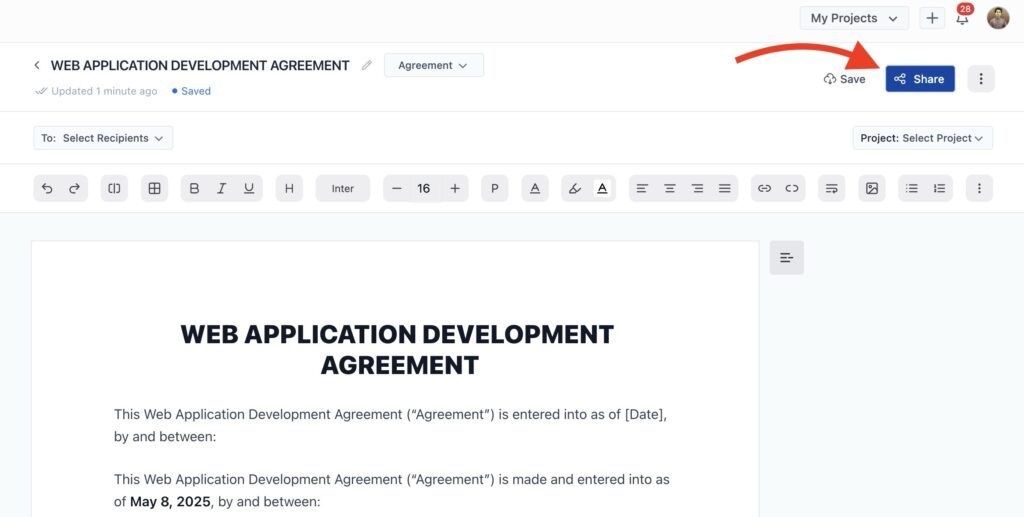
ur document content and field setup are complete, you can either save your work for later or move forward to add signature fields and send it.
Save as Draft
Click the “Save” button at the top-right.
This will store your document as a draft, allowing you to return to it later to continue editing, add signers, or make updates.
Share the Document
Click the “Share” button next to Save. It marks the starting point of getting your doc signed.
Clicking the “Share” button opens the signature editor, where you can add signing fields (like Signature, Date, Text, or Checkbox) for each party.
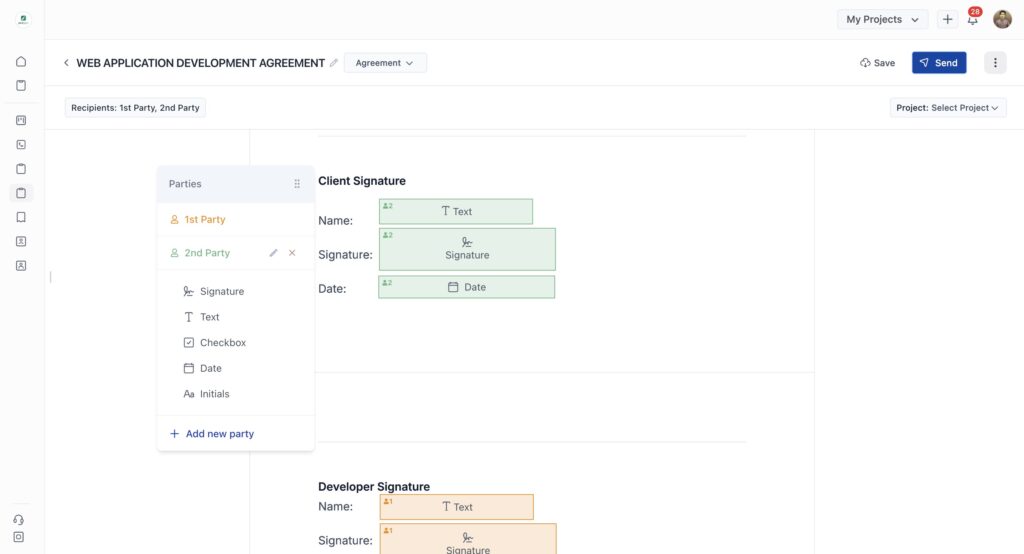
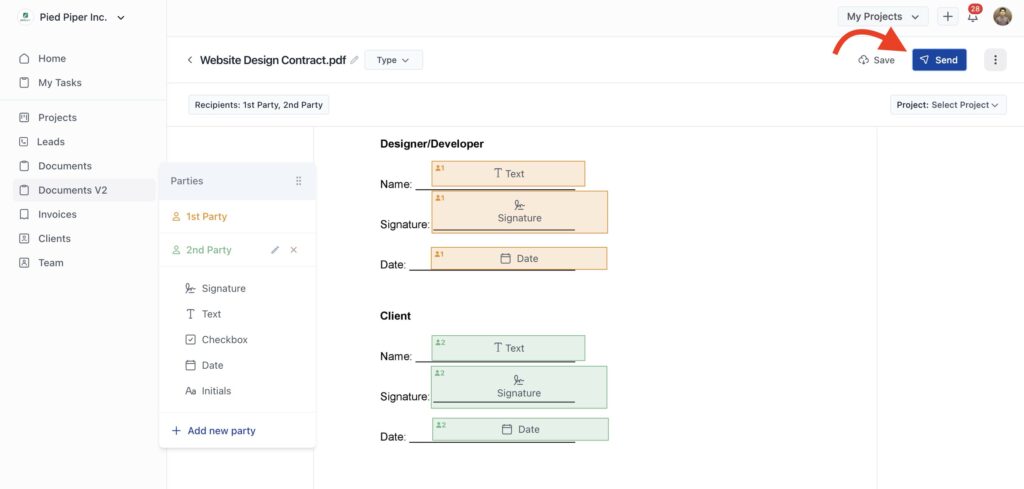
Adding Signer Fields #
After clicking Share, you’ll be taken to the signature field editor. This is where you define where each signer should add their input.
Go to the left side of the screen and choose the field you want to add.
Available fields include:
– Signature
– Date
– Text
– Checkbox
– Initials
Drag and drop the selected field onto the correct location in the document.
Each field is color-coded by party, so you can easily see which signer is responsible for which section.
Send for Signature #
After adding all field placements, click “Save” and then“Send” to move to the signer selection.
After clicking Send, you’ll be taken to the signer confirmation and email customization screen. From here, the sending document step starts.
👉 Next Step: Sending Documents to Parties to Sign →