If you charge taxes—like sales tax, VAT, or service tax—you can set them up in OneSuite and apply them to any invoice in just a few clicks. Whether you’re working with clients locally or internationally, OneSuite makes it easy to manage multiple tax rates and apply them accurately across your billing.
This guide walks you through how to create tax rates, apply them, and combine them when needed.
Create your standard tax rates #
Before sending invoices or estimates, it’s a good idea to set up your commonly used tax rates—like Sales Tax, VAT, or Service Tax. Once added, these rates will be available across all your documents and can be applied with a single click.
Follow these steps to create your tax rates:
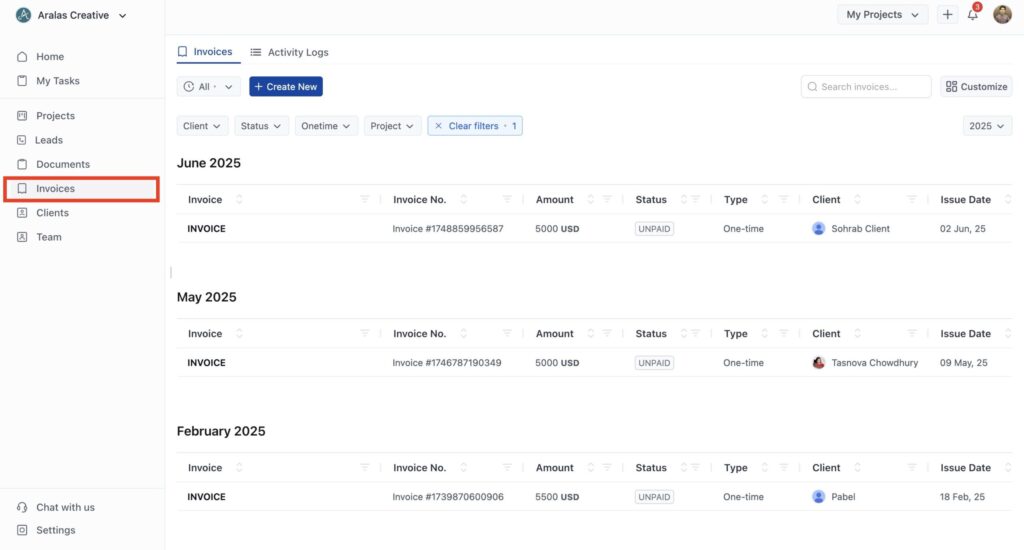
Navigate invoices on the OneSuite sidebar, and it will take you to the invoice home, where you will see the invoices you created.
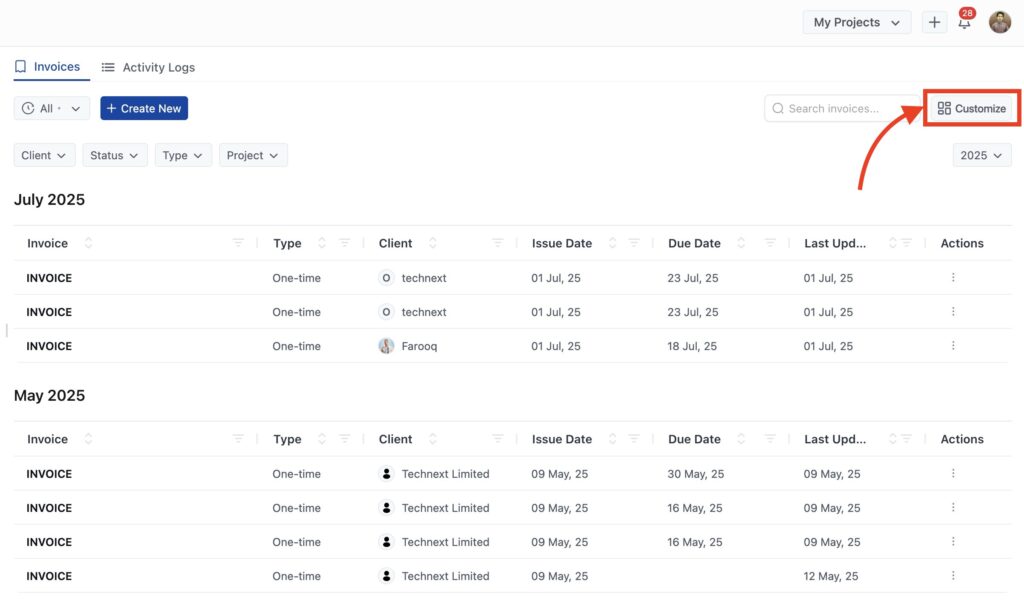
In the top-right corner, click the Customize button to open your settings panel.
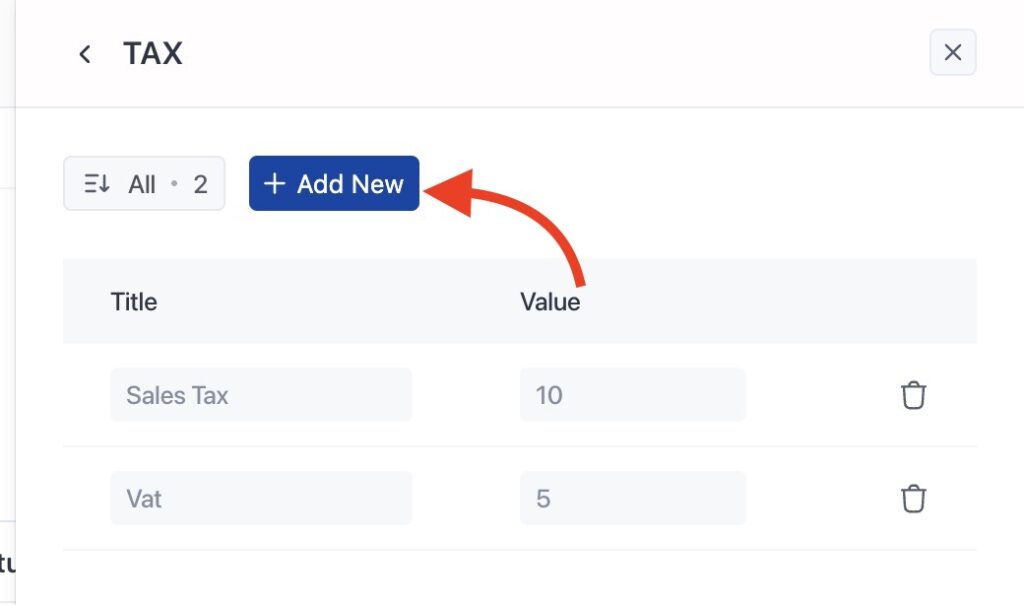
Choose the TAX tab to manage your tax list. You’ll see existing tax rates (if any) and the option to add more.

Click the + Add New button to create a new tax rate.
Type a name that clearly describes the tax, such as “Sales Tax (CA)”, “VAT (UK)”, or “Service Tax”. This title will appear on your invoices and estimates.
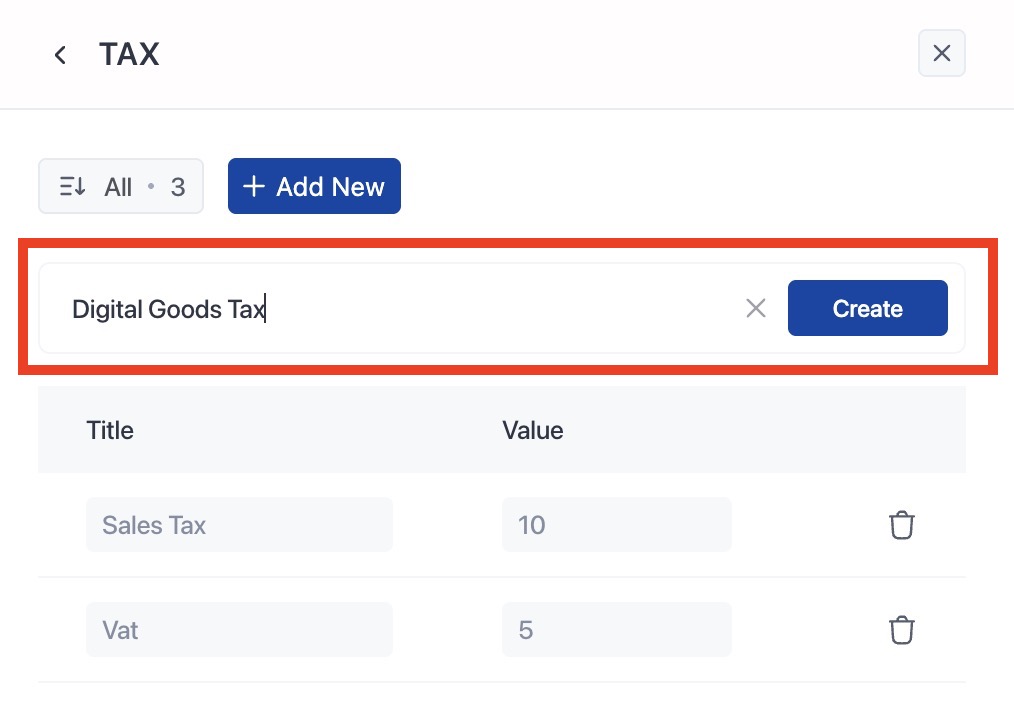
Enter the numeric percentage for the tax (e.g., 10 for 10%). OneSuite will use this to calculate tax.
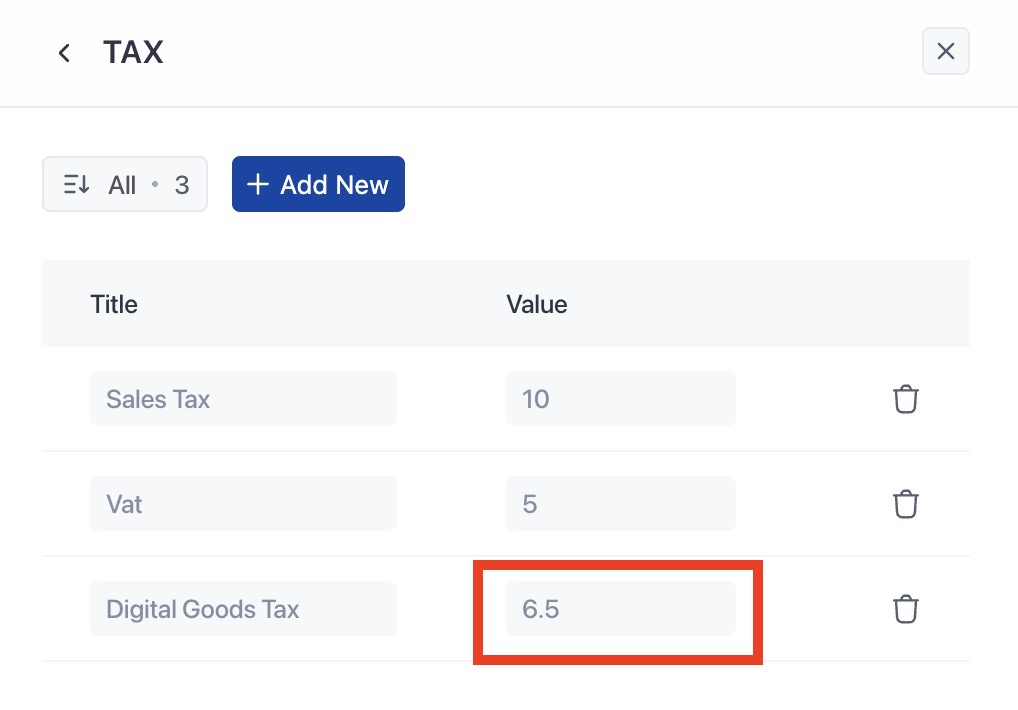
Once both fields are filled, click anywhere outside the input to save the tax. It will now appear in your tax dropdowns.
If you charge different rates for different locations or services, you can create multiple tax types. They’ll all be saved for future use.
Best practices
- Avoid deleting frequently used taxes—just rename or update them if needed
- Keep your tax names clear and specific (e.g., “NY Sales Tax – 8.875%”)
- Review tax rates periodically to ensure they reflect current legal requirements
Apply taxes to your invoices and estimates #
Once you’ve created your standard tax rates, you can apply them during invoice or estimate creation. You can apply different taxes to different items—or even add multiple tax types to the same invoice.
Here’s how it works:
Click + Create New from Invoice Home or Estimate Home.
Fill out the required fields like client, project, issue date, and add your line items with quantity and price
Once your items are added, scroll down to the summary section—just below the subtotal and discount fields. This is where you’ll add taxes.
📘 Need help with this step? See: How to create an invoice

Click on the tax dropdown and choose one of your predefined tax rates. The system will calculate and apply it instantly.
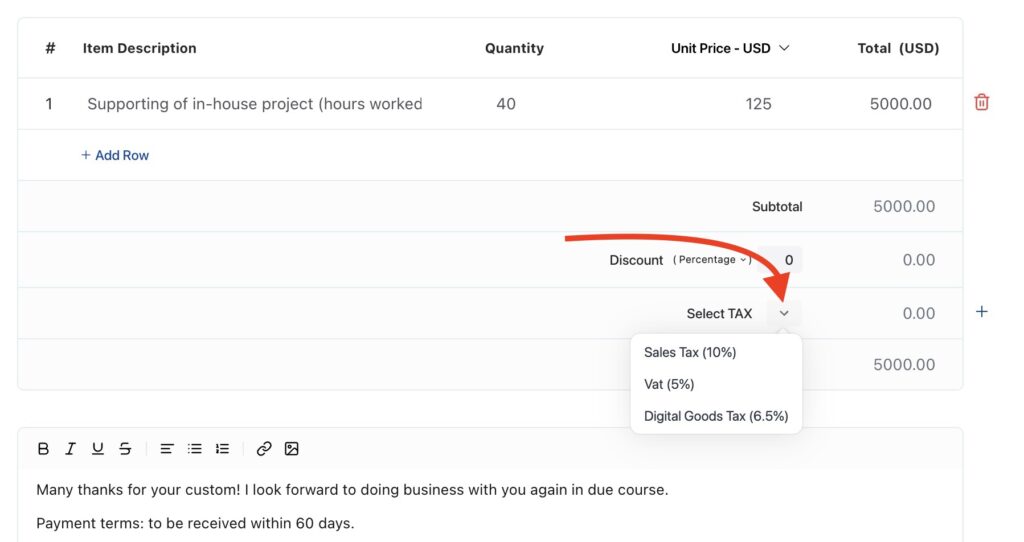
If you need to apply more than one tax (e.g., Sales Tax + VAT), click the ➕ plus icon beside the tax field. A second dropdown will appear—select another tax from the list.
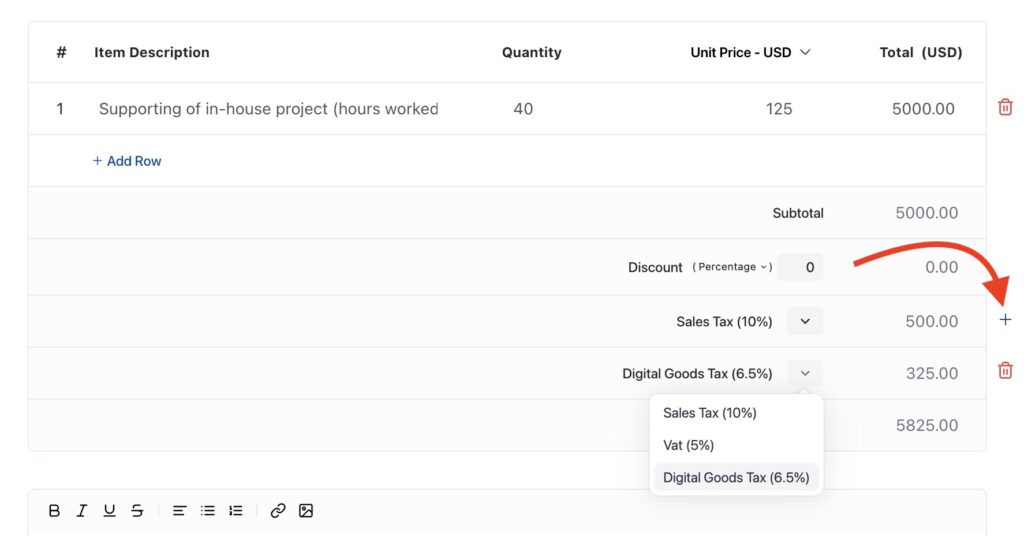
OneSuite automatically calculates and displays each tax in the summary. Check that:
- The correct tax rates are applied
- The totals reflect any discounts or multiple taxes
- All invoice details (like client, project, and dates) are accurate
Once confirmed:
- Click Save to keep the invoice as a draft
- Or click Share to send it directly to your client via email
🔒 Taxes can only be edited while the invoice is in Unpaid status. Once marked as Paid, the invoice is locked.