Once a document is sent through OneSuite, all assigned parties will receive an email with a secure link to view and sign. Signers don’t need a OneSuite account—just click, sign, and submit.
Here’s how the signing experience works from the recipient’s side.
Email Invitation to Sign #
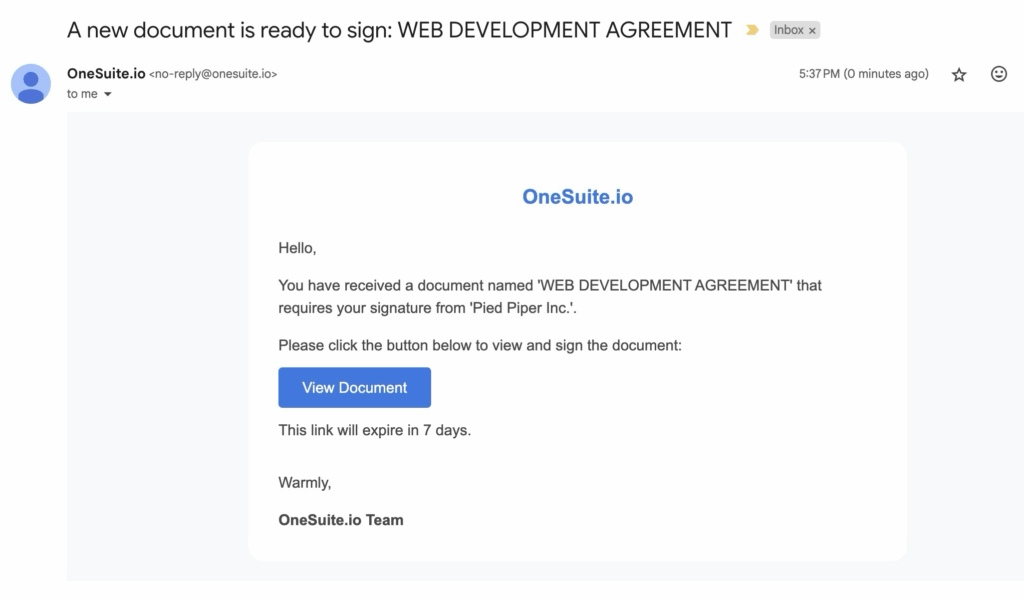
Each signer receives a personalized email with a signing link.
This email includes the document title, sender information, and a secure button to view the document.
📌 If the sender customized the message, signers will see that personalized content too.
Open the Document #
Click the “View Document” button in the email.
This opens a secure, browser-based viewer—no login is required.
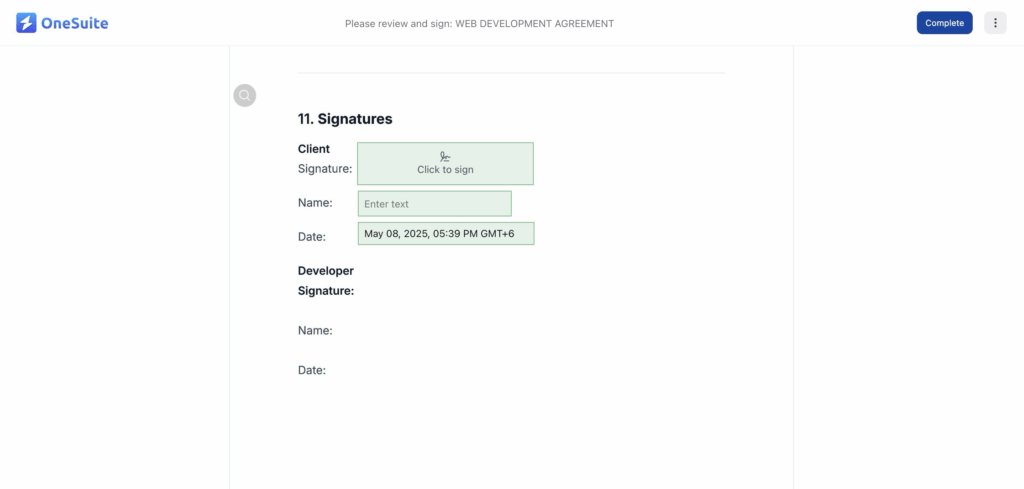
Fill in Fields #
The document will highlight all fields assigned to the signer.
Click on each field to complete it:
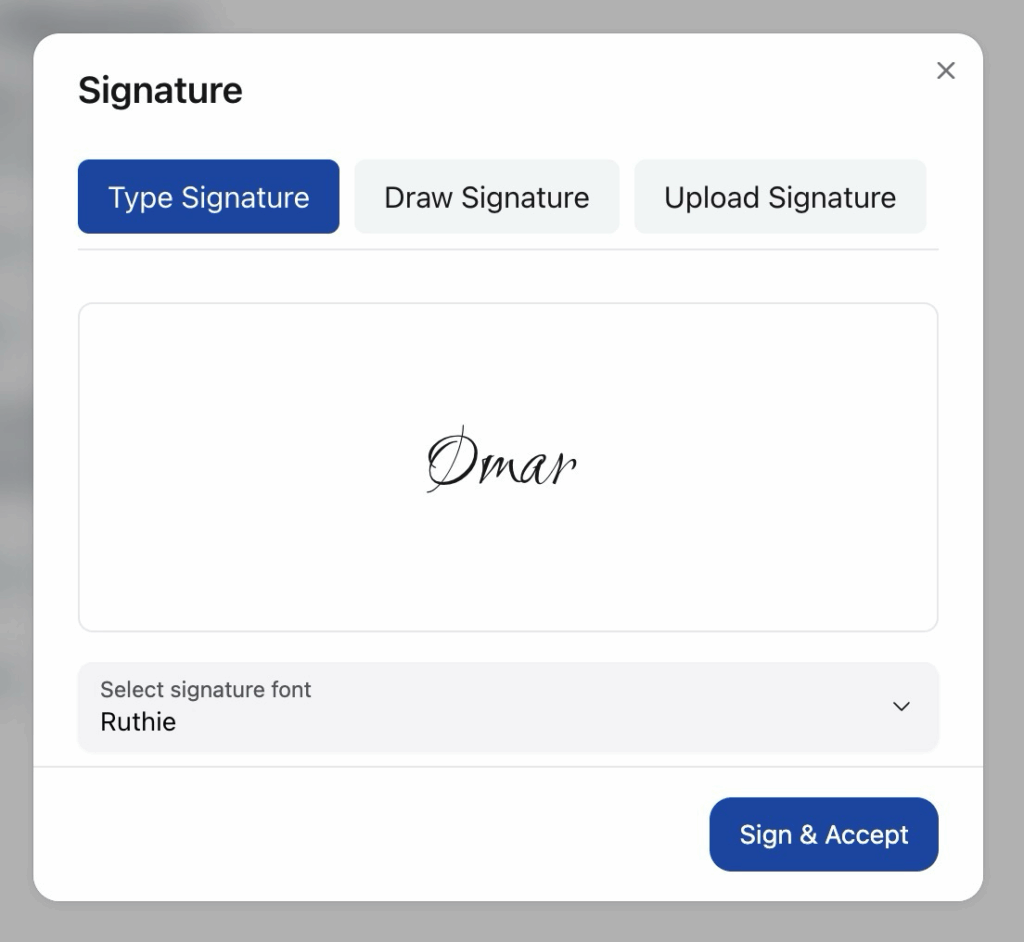
- Signature: Choose to type, draw, or upload your signature.
When typing, you can also select from multiple font styles to match your preference.
- Initials: For initialing specific sections or pages
- Date: Auto-filled based on the signer’s location.
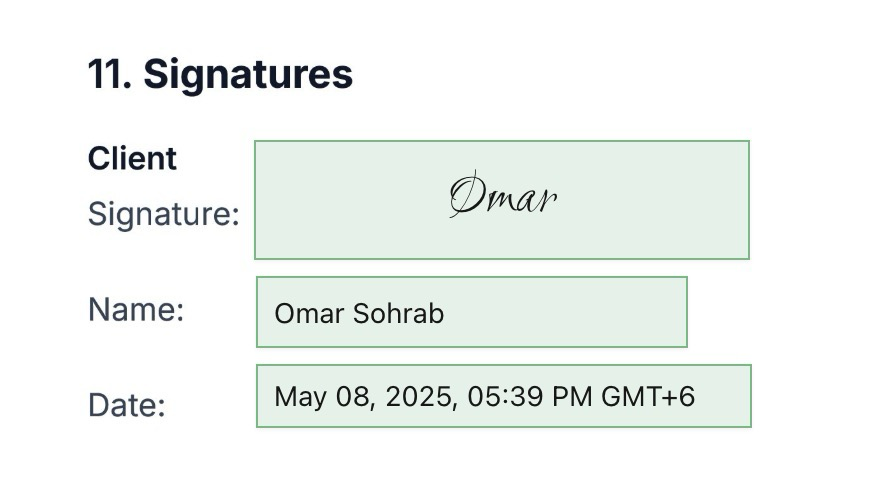
- Text field: For entering name, title, or company
- Checkbox: For accepting terms or confirming information
📌 Only the fields assigned to the signer will be editable. All others will appear as read-only.
Complete and Submit #
After filling in all required fields:
Click the “Complete” button in the top-right corner.
The document will be automatically submitted, and the signer will see a confirmation screen.

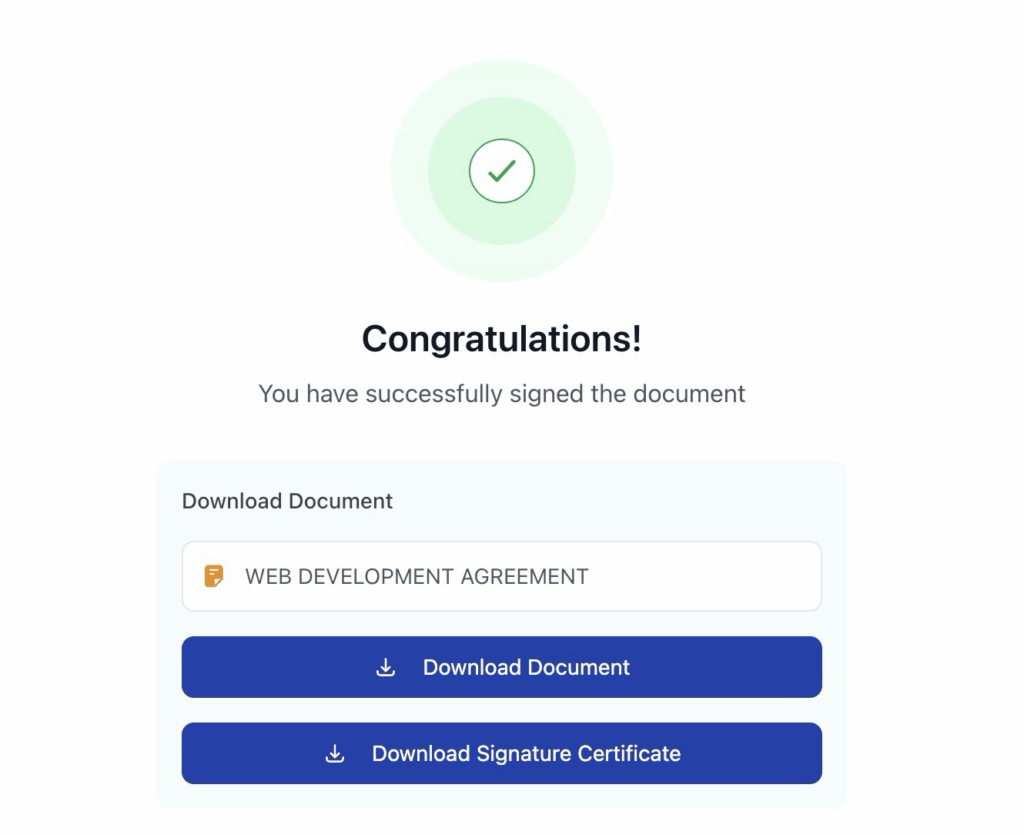
Download Options After Signing #
After signing, the signer can:
- Download the signed document (PDF)
- Download the signature certificate for verification and legal recordkeeping