Search Bar #
- Search bar (left-aligned)
- Allows users to search through opportunity records by keyword — such as opportunity name, company, contact, or deal value.
- Typing in this field filters the displayed list in real time.
How to Search for an Opportunity #
- Go to the Opportunities tab inside your CRM
- Look for the Search opportunities… bar in the top right corner of the screen
- Click on it — your cursor will appear inside the search box
- Start typing the name of the opportunity, company, or deal
- Results will appear as you type — click on the one you’re looking for to open it
Search Opportunities #
Each column represents a stage in your sales process. The default stages are:
- Contacted – Deals where you’ve made first contact but nothing formal yet.
- Qualification – Opportunities you’re actively exploring. Is this a real fit?
- Proposal Sent – You’ve sent a proposal and are waiting on a decision.
- Won – Closed deals. The finish line.
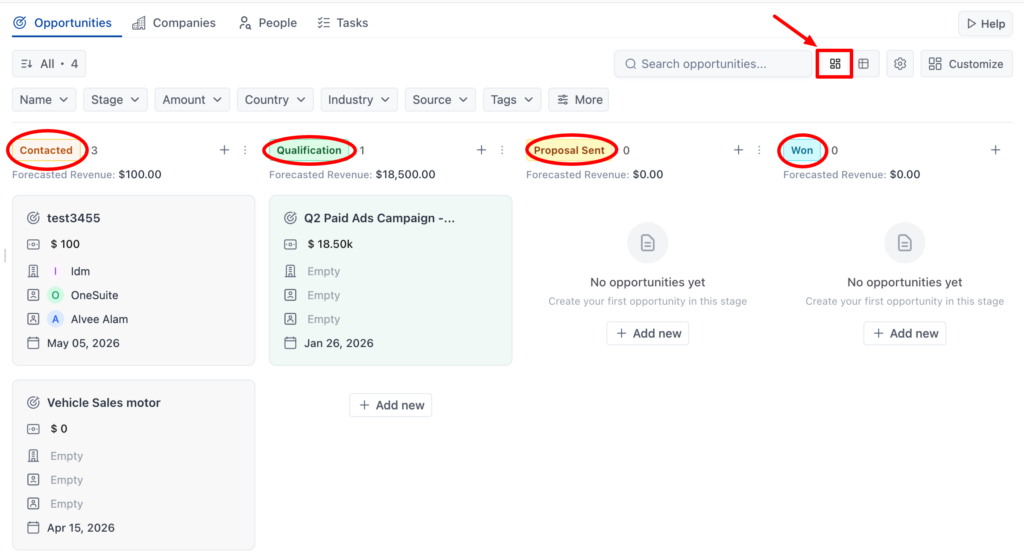
At the top of each column you’ll see a deal count and a Forecasted Revenue total. That number adds up the amounts on every opportunity in that stage.
The Opportunities List View #
The List view shows your pipeline as a table. Same deals as the Kanban view, different format. Use it when you want to compare opportunities side by side, sort by a specific column, or see more deals on screen at once.
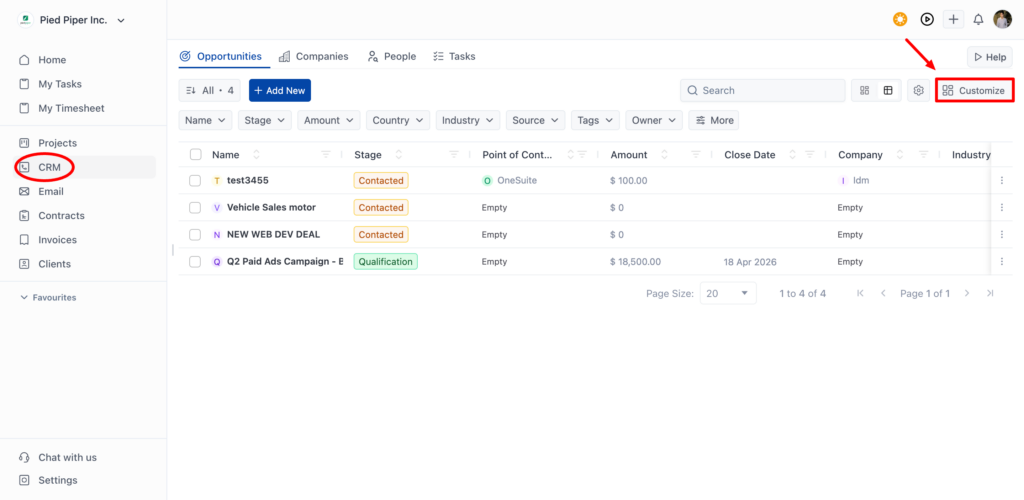
Customize #
Click Customize in the top right of the Opportunities view to tailor CRM to how your business actually works. It opens a panel with five sections.
Tab #
Tab Settings controls which sections appear in your CRM navigation. All four are turned on by default:
- Opportunities – Your sales pipeline. Leave this on.
- Companies – Your organization database.
- People – Your contact database.
- Tasks – All CRM-related tasks in one place.
Industry #
Manage the list of industries available when categorizing companies and opportunities. Add, edit, or remove options to match your market.
Source #
Source tracks where your opportunities come from. OneSuite comes with six sources ready to use:
- Email Campaign – Leads that came in through an email marketing campaign
- SEO – Prospects who found you through organic search
- LinkedIn – Connections and outreach from LinkedIn
- Event – Leads you met at a conference, webinar, or any live event
- Referral – Deals sent your way by an existing client or partner
- Website – Inbound inquiries through your website
Tag #
Create and manage tags for organizing opportunities. Tags let you group and filter deals by anything that doesn’t fit a standard field.
Adding a Tag
Type a name in the Tag name field and click + Add Tag. That’s it. The tag is now available to apply to any opportunity.
Opportunity Automation – Set up automated actions that trigger as deals move through your pipeline. Move a deal to a new stage and let OneSuite handle the follow-up steps automatically.
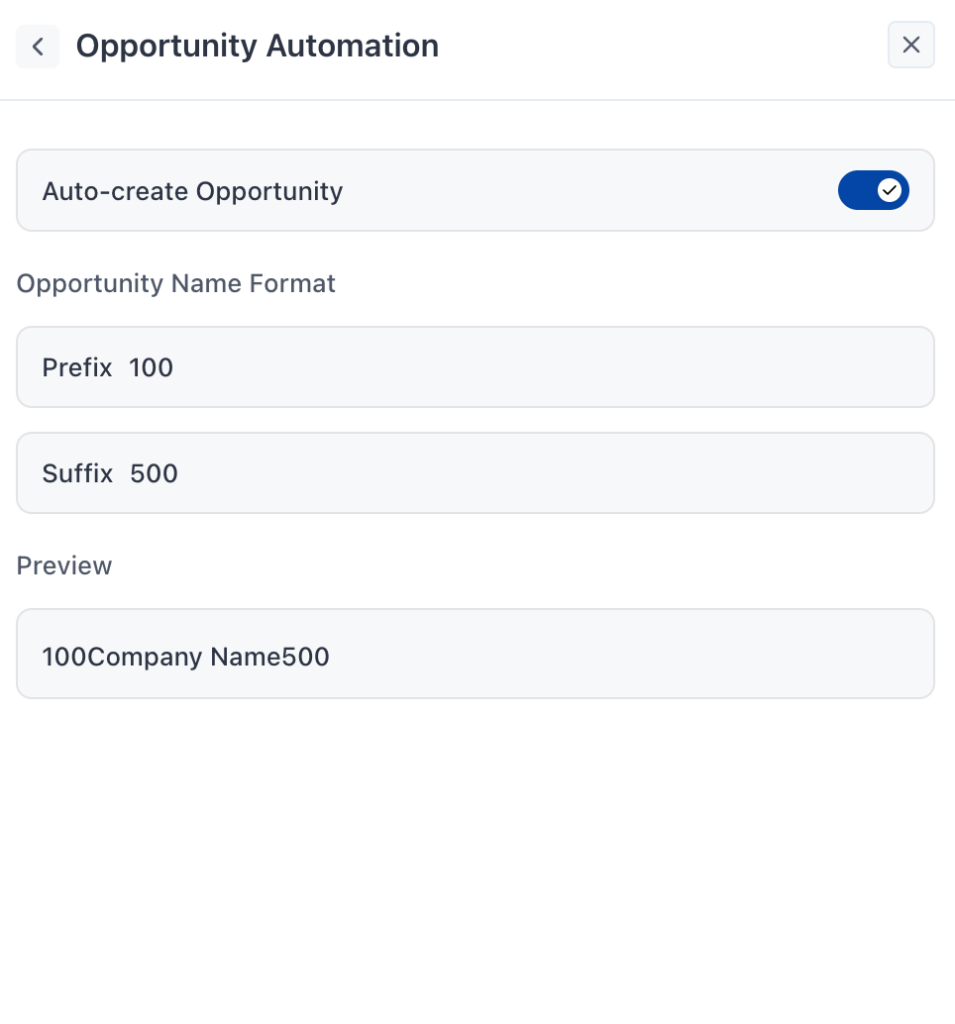
Opportunity Automation #
Opportunity Automation reduces manual work by creating opportunities for you automatically. One setting, one naming format, and CRM starts building your pipeline without the extra steps.
Auto-create Opportunity
This toggle is on by default. When enabled, OneSuite automatically creates a new opportunity whenever a new company or contact enters your CRM. You don’t have to remember to create it manually — it’s already there waiting.
Turn it off if you prefer to create opportunities yourself, one by one, only when there’s a real deal to track.
Opportunity Name Format
Control how auto-created opportunities get named. Two fields let you wrap the company name with your own text:
- Prefix – Text that appears before the company name. For example, Deal – produces Deal – Company Name
- Suffix – Text that appears after the company name. For example, – New produces Company Name – New