The OneSuite Calendar View turns your project schedule into a single, visual timeline so you always know what’s due, who owns it, and where deadlines are stacking up.
Agencies use it to track project deadlines, manage task due dates, spot scheduling conflicts before they happen, and plan team capacity across every active client without switching between boards or spreadsheets.
My Tasks #
Calendar View #
What the Calendar View Solves
Running a digital agency means tracking deliverables across multiple clients, projects, and team members all at once. Before the Calendar View, knowing when work was happening meant cross-referencing project boards, task lists, and external calendars separately.
The Calendar View changes that. It surfaces every task assigned to you across every project in a single time-based grid. The moment you open My Tasks, you know exactly how your week is structured and where your deadlines fall.
Note :The Calendar View does not replace the project board. It adds the scheduling layer that list views cannot provide.
Anatomy of the Calendar View #
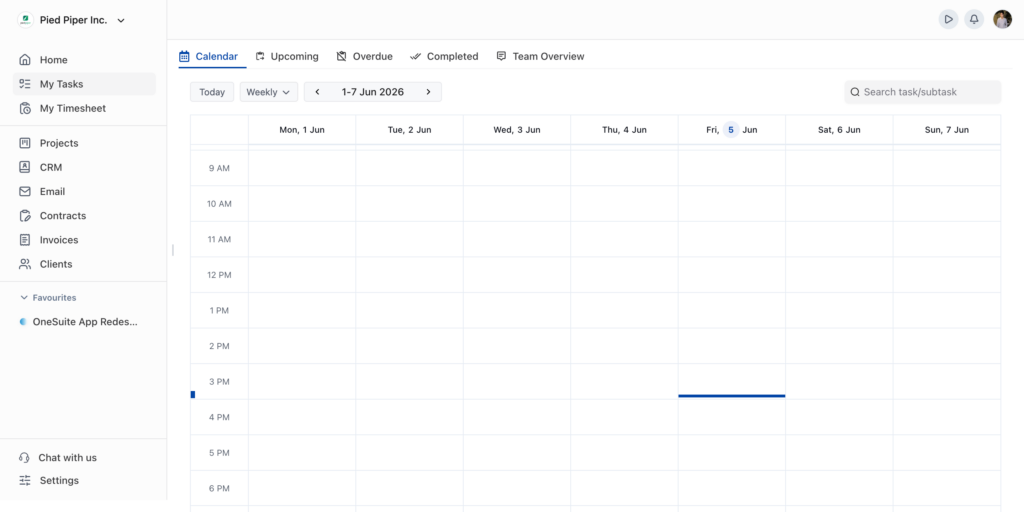
The Calendar View is accessible from My Tasks → Calendar tab. Below are all the interface elements you will see when you open it
- Weekly grid Seven columns (Mon–Sun) with an hourly row layout. Tasks appear as blocks in the cell matching their due date and time.
- Date navigation ‹ and › arrows move between weeks. The Today button snaps back to the current week instantly.
- Task search Filter the calendar in real time to show only matching tasks or subtasks no scrolling required.
- All-day row Tasks without a specific time appear in the pinned All-day row at the top, separate from timed tasks.
- Favourites panel Pin frequently visited projects to the left sidebar for one-click access without leaving the calendar.
- View scope toggle Switch between Daily, Weekly, and Monthly views using the dropdown next to the Today button.

Status tabs #
All five tabs at the top of My Tasks draw from the same task data they are filters, not separate views.
- Calendar — the time-based grid view covered in this document.
- Upcoming — tasks scheduled in the future, sorted chronologically.
- Overdue — tasks whose due date has passed without being marked complete.
- Completed — an archive of finished work, useful for reporting.
- Team Overview — a cross-team view of tasks and workload.
Customizing the Calendar View #
The Calendar View adapts to how your agency works. Here are all the customization options available.
Changing the view scope #
- Click the Weekly dropdown button next to the Today button.
- Select Daily for a single focused day, Weekly for the standard workweek, or Monthly for a high-level month view.
- Your selection persists until you change it again.
Note Use Daily view during focused work blocks to eliminate all visual noise outside the current day. Switch back to Weekly for planning sessions.
Navigating between dates #
Click the ‹ and › arrows flanking the date range label to move backward or forward through weeks.
Click Today at any time to jump immediately back to the current week.
The active day is highlighted with a blue indicator on its column header.
Pinning projects to Favourites #
- Open any project from the Projects section.
- Click the star icon next to the project name.
- The project appears under Favourites in the sidebar and stays there across sessions.
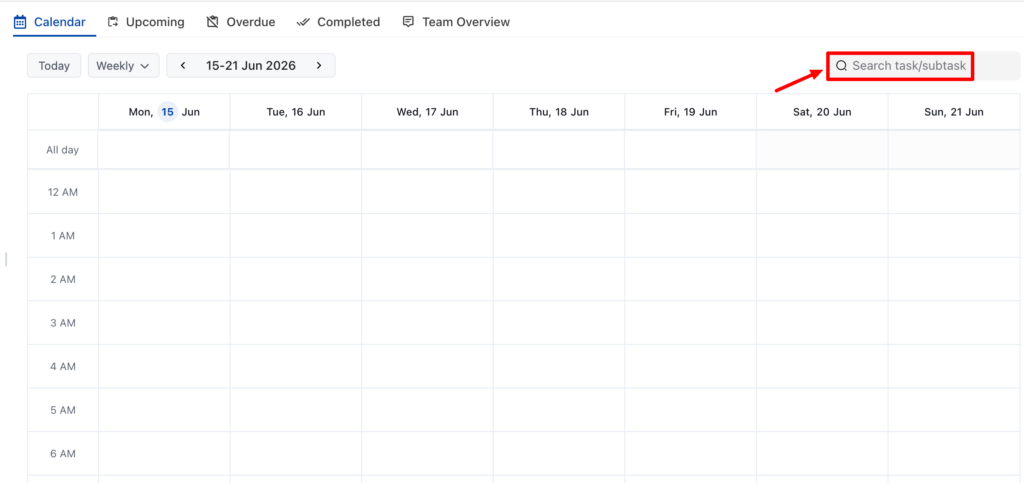
Searching for a task #
- Click the Search task subtask field in the top-right corner of the calendar header.
- Begin typing the calendar filters in real time. Search works across task names and subtask names.
- Clear the field to return to the full calendar view.
Note If a task does not appear in the current date range, use the Upcoming or Overdue tabs to locate it.
Creating a Task in OneSuite #
Tasks are the building blocks of your work in OneSuite. Create them directly from the My Tasks calendar, assign them to team members, link them to projects, and track estimated vs. actual time all from one focused dialog.
How to create a task #
The fastest way is directly from the My Tasks calendar view. Click any time slot to open the Create Task dialog instantly.
- Navigate to My Tasks in the left sidebar.
- Click any time slot in the calendar the Create Task dialog appears. Alternatively, use + New Task at the top right.
- Enter a Task Name. This field is required.
- Set the Schedule: start date, start time, end time, and end date.
- Fill in Estimated Time (in hours). Optionally log Actual Time once the task is underway.
- Set the Priority (High, Medium, or Low) and apply a Label if needed.
- Optionally connect the task to a Project using the dropdown.
- Add one or more Assignees from your team.
- Click Save. The task appears on the calendar at the scheduled time.
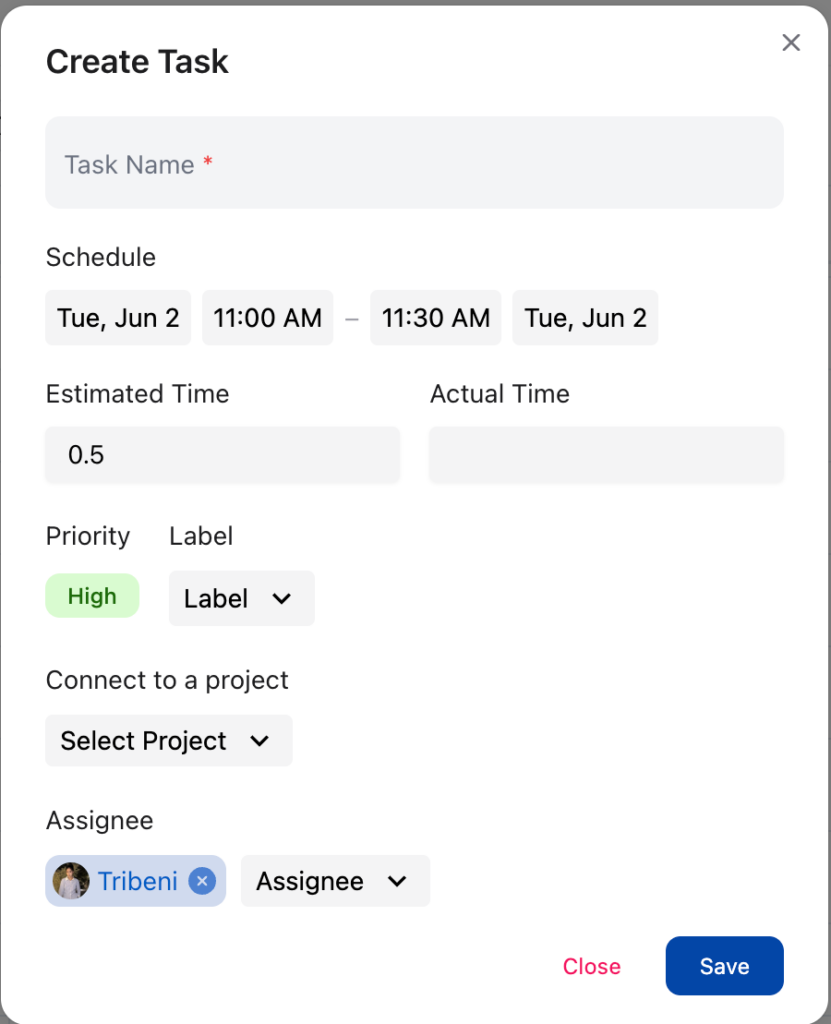
Note : Clicking a time slot on the calendar pre-fills the start time automatically saving a step every time you create a task.
Task fields explained #
- Field- Description
- Task Name- Required. Use a clear, action-oriented name. ‘Design homepage hero’ is better than ‘Design work’.
- Schedule- Set start date, start time, end time, and end date. Clicking a calendar slot pre-fills these automatically.
- Estimated Time- How long you expect the task to take, in hours. E.g., 0.5 = 30 min, 2 = 2 hrs. Feeds into billing reports.
- Actual Time- Log real time spent. Fills in during or after the task. Used in timesheets and invoice generation.
- Priority- High, Medium, or Low. Helps teams identify what needs attention first when filtering across projects.
- Label- Custom tags to categorize work by client, type, or any dimension useful for filtering and reporting.
- Connect to a Project- Links the task to a project board and contributes to project-level time tracking. Leave blank for personal tasks.
- Assignee- One or more team members. Each assignee sees the task on their own My Tasks calendar.
How to Use the Calendar View #
Opening the Calendar View #
Go to My Tasks Click My Tasks in the left sidebar after logging in to OneSuite and selecting your workspace.
Select the Calendar tab Click Calendar in the top navigation row. The grid opens on the current week by default.
Orient yourself The current day is highlighted with a blue indicator on its column header. Tasks due this week appear as labelled blocks in the grid.
Opening and editing a task #
Locate the task block Tasks appear in the cell matching their due date and time. A truncated name means the title is longer than the block hover to see the full name.
Click the task block The task detail panel opens. From here you can edit the name, due date, assignee, priority, status, and description
Save your changes Changes are saved automatically as you edit. Close the panel to return to the calendar.
Switching the view scope #
Click the Weekly dropdown Located next to the Today button in the top-left of the calendar header.
Select your preferred scope Daily for a focused single-day view, Weekly for a full workweek, Monthly for a high-level overview.
Navigate freely Use the ‹ and › arrows to move between periods. Click Today to return to the current period at any time.