Every client has a detailed profile that stores all their information, communication history, and connections to projects, invoices, and documents. The profile is organized into a left sidebar with client details and tabs across the top for different types of information.
Accessing a Client Profile #
To view a client profile:
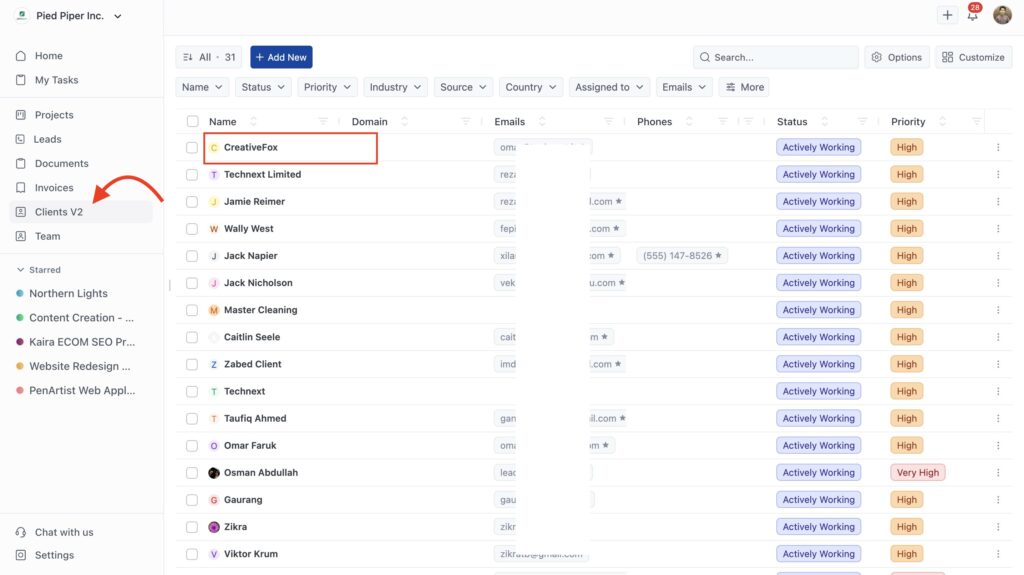
- Click Clients V2 in the sidebar
- Click any client name in the list
The profile opens showing the Timeline tab by default and the client information sidebar on the left.
Click Back to Clients at the top to return to your client list.
Client Information Sidebar #
The left sidebar shows all stored information about the client. You can edit any field directly by clicking it.
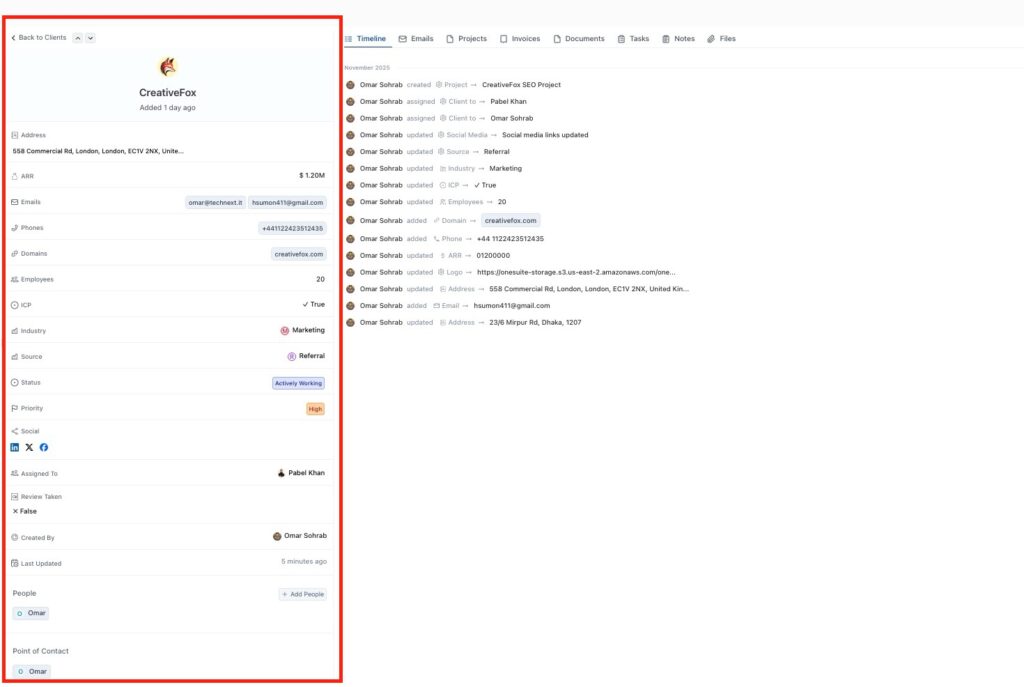
All client profiles include:
- Address – Physical location
- Emails – Primary and additional email addresses (click the star to set primary)
- Phones – Contact phone numbers
- Domains – Website addresses
- Job Title – Position or role (Individual clients only)
- Industry – Client’s business sector
- Source – How they found you
- Status – Current relationship status with colored indicator
- Priority – Urgency level with colored indicator
- Social – Social media profile links
- Review Taken – Custom field (if configured)
- Assigned To – Team member managing this client
- Created By – Person who added the client
- Last Updated – Most recent change timestamp
Custom fields appear after the standard fields if you’ve created any. These show whatever additional information you’ve configured for tracking (budget ranges, project types, preferences, or any other data specific to your business).
Company Profile Differences #
Company-type clients have additional fields and sections that Individual clients don’t have.
Company-specific fields:
- ARR – Annual Recurring Revenue (displayed near the top)
- Employees – Number of employees
- ICP – Ideal Customer Profile indicator (true/false)
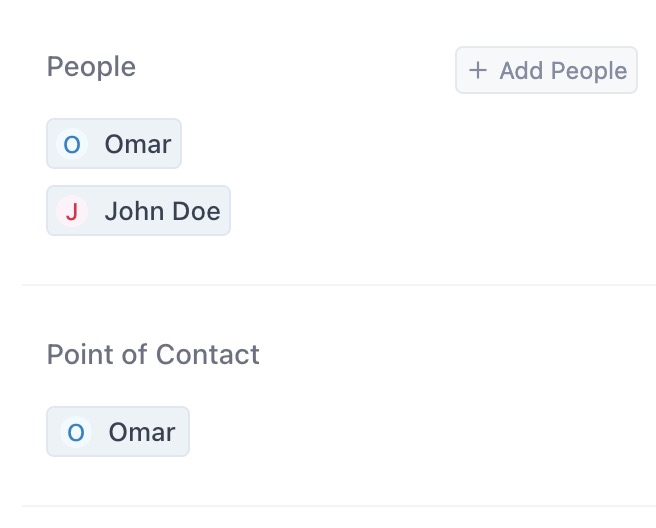
People Section: Shows everyone who works at the company. Click Add People to add more contacts. Each person displays with their name and a small profile indicator.
Point of Contact: Designates your primary communication person at the company. Shows their name and profile. Click to change or set a different Point of Contact.
Profile Tabs #
Tabs across the top organize different types of information about the client. Click any tab to switch views.
Available tabs:
Timeline Shows chronological activity history. Every action related to this client appears here (projects created, emails sent, status changes, invoices, documents).
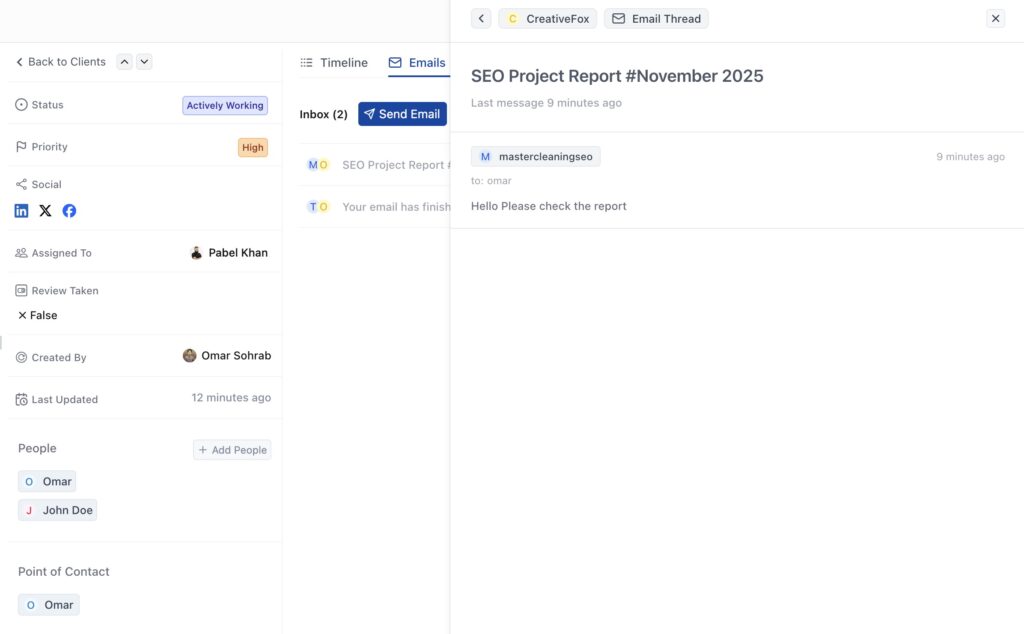
Emails Displays all email communication with the client. Shows inbox with threaded conversations. Click any email to read the full thread. Click Send Email to compose a new message.
Note: Email integration must be connected in Settings for this tab to work.
Projects Lists all projects linked to this client. Shows project names, status, and quick access to open them.
Invoices Displays all invoices sent to this client. Shows invoice numbers, amounts, status (Paid, Unpaid, Overdue), and due dates.
Documents Lists all proposals, contracts, and documents shared with this client. Shows document titles, types, and signature status.
Tasks Shows all tasks related to this client across all projects. Helps you see what needs to be done for this customer.
Notes Displays notes you’ve added about the client. Use this to record important information, preferences, or conversation details.
Files Shows all files uploaded or attached to this client record. Provides central storage for client-related documents.
Invitation Status #
At the bottom of the sidebar, you’ll see the client’s portal invitation status.

Accepted – Client has portal access and can log in to view their information. Shows a green checkmark. Click Revoke Access to remove portal privileges.
Pending – Invitation sent but client hasn’t accepted yet. You can resend the invitation if needed.
Not Invited – Client doesn’t have portal access. Click to send an invitation.