There are three ways to add clients to OneSuite: create them manually, convert them from CRM opportunities, or import multiple clients at once. This guide covers manual creation for both Individual and Company client types.
Adding an Individual Client #
To create an Individual client:

- Click Clients in the sidebar
- Click Add New in the top right
- Select Individual as the client type
- Fill in the client information:
- Client Name (required)
- Primary Email – Add one primary email of that client.
- Optional: Check Invite to client portal to send portal access immediately
- Optional: Check Include custom invitation message to personalize the invitation
- Click Create Client
The client appears in your client list immediately.
Adding a Company Client #
To create a Company client:
The first two steps are the same as creating Individual clients.
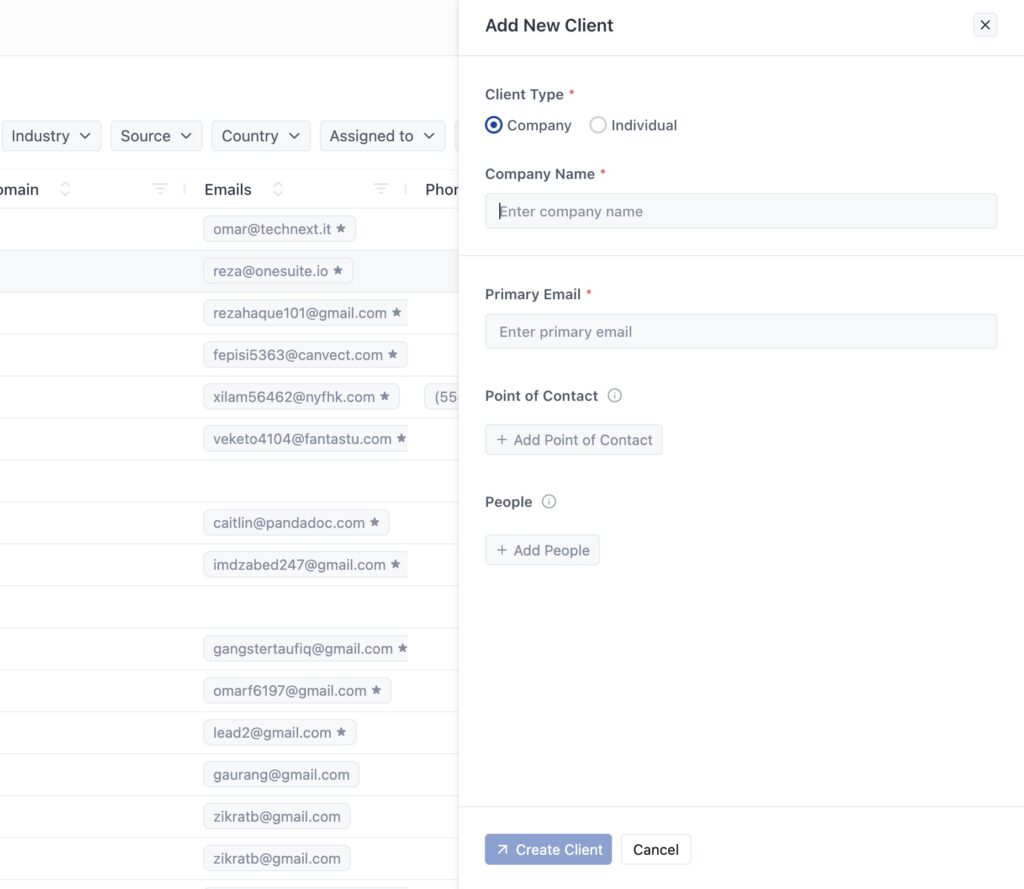
- Select Company as the Client Type
- Fill in the required fields:
- Company Name – Organization name
- Primary Email – Main company contact email
- Optional: Click Add Point of Contact to designate your primary contact person
- Optional: Click Add People to add additional contacts who work at the company
- Click Create Client
Adding People during setup: You can add multiple people who work at the company right away. Click Add People and enter their name, email, phone, and job title. Add as many people as you need before creating the client.
Setting Point of Contact during setup: Point of Contact is your primary communication person. Click Add Point of Contact to designate who you’ll talk to most often. You can only set this after adding at least one person to the People list.
Client Portal Invitation #
When creating any client, you can invite them to the client portal right away. The portal gives clients access to view their projects, invoices, and documents.
Invite to client portal – Check this to send an automatic invitation email to the primary email address. The client receives login credentials and can access their portal immediately.
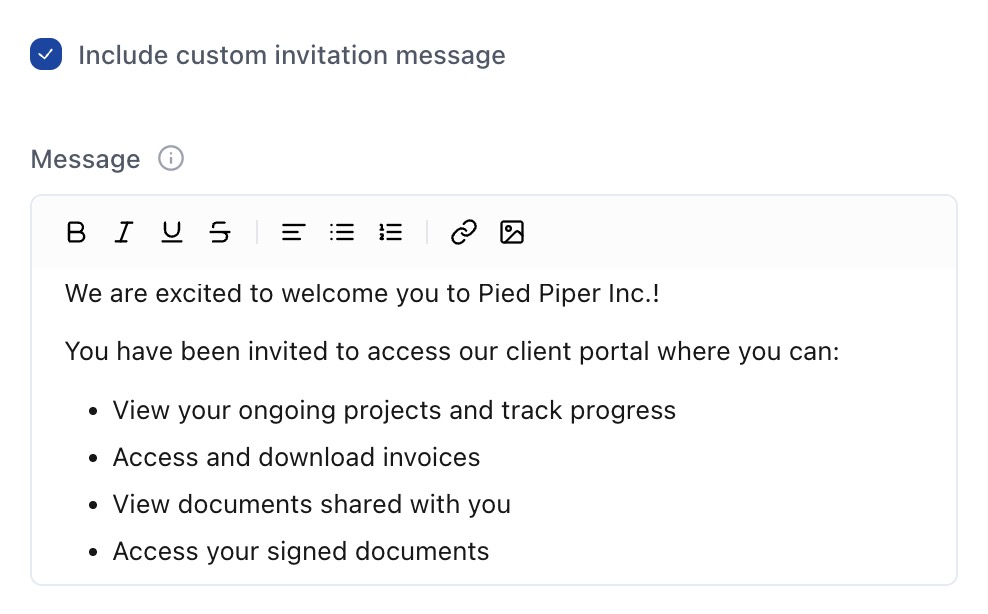
Include custom invitation message – Check this to add a personalized message to the invitation email. Use this to welcome the client or provide context about the portal.
If you skip the invitation during creation, you can send it later from the client profile.
Other Ways to Add Clients #
Converting from CRM When you close an opportunity in your CRM, OneSuite can automatically create a client record. All contact information and history transfers over. See Converting Leads to Clients for details.
Adding More Information After Creation #
The quick creation form only asks for essentials. After creating a client, open their profile to add:
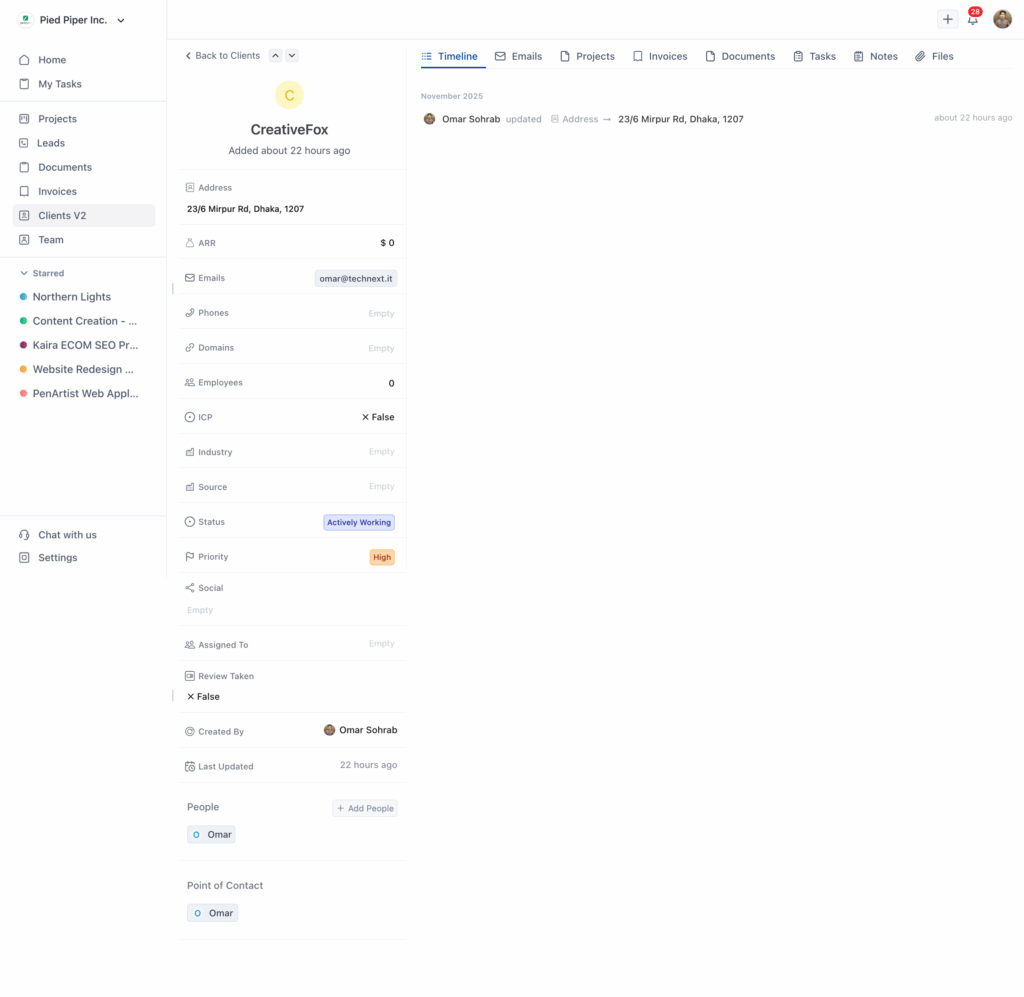
Contact Details:
- Additional email addresses
- Phone numbers
- Physical address
- Website/domain
Classification:
- Status (Actively Working, Completed, Abandoned)
- Priority (High, Very High, Medium)
- Industry
- Source (how they found you)
- Assigned To (team member managing this client)
Company-Specific Fields:
- Annual Recurring Revenue (ARR)
- Number of employees
- Ideal Customer Profile indicator
- Multiple domains
For Company Clients: If you didn’t add People or Point of Contact during creation, you can add them anytime from the client profile.