Get paid faster with professional invoices that take just minutes to create. Whether you’re billing a new client or wrapping up a project, you’ll have a polished, payment-ready invoice in no time.
Before You Start
Make sure you have:
- Client information added to OneSuite
- Work completed and ready to bill
- Your business information set up in Invoice Settings
Step 1: Start Your Invoice #
1. Navigate to Invoices in your left sidebar
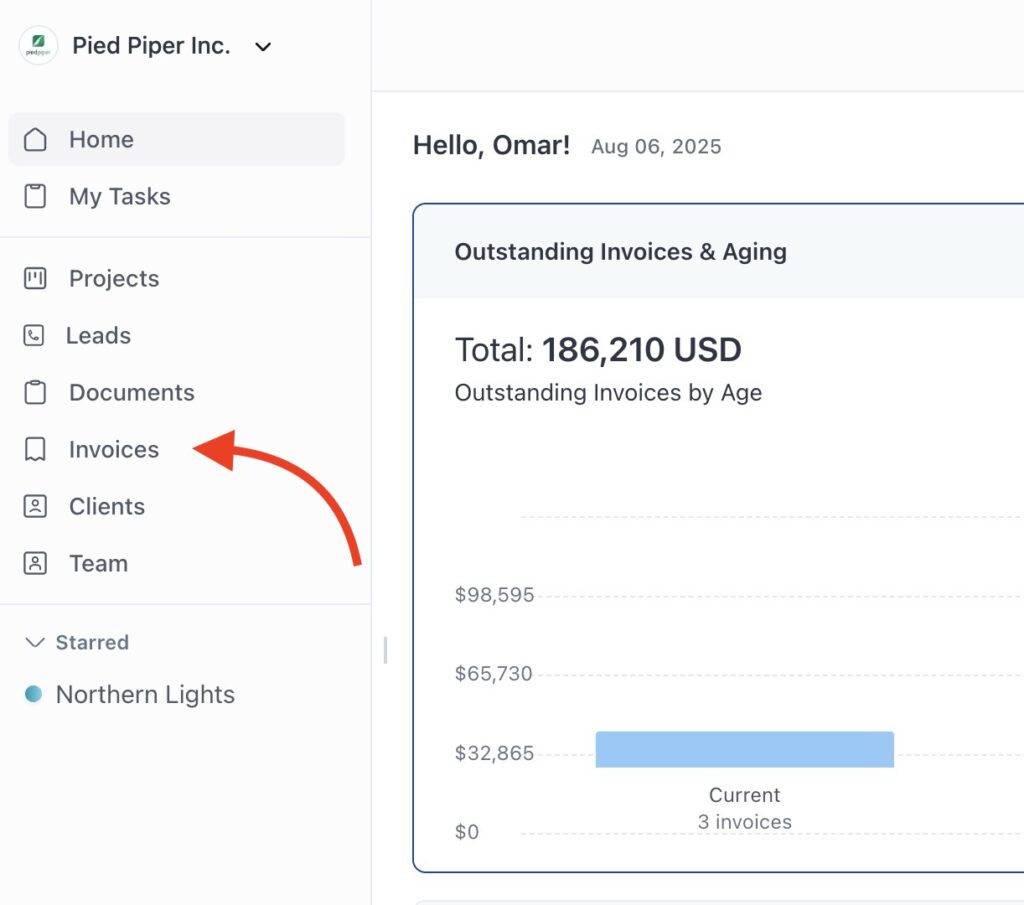
2. Click the Create New button in the top-right corner

You’ll see the invoice creation page with two options:
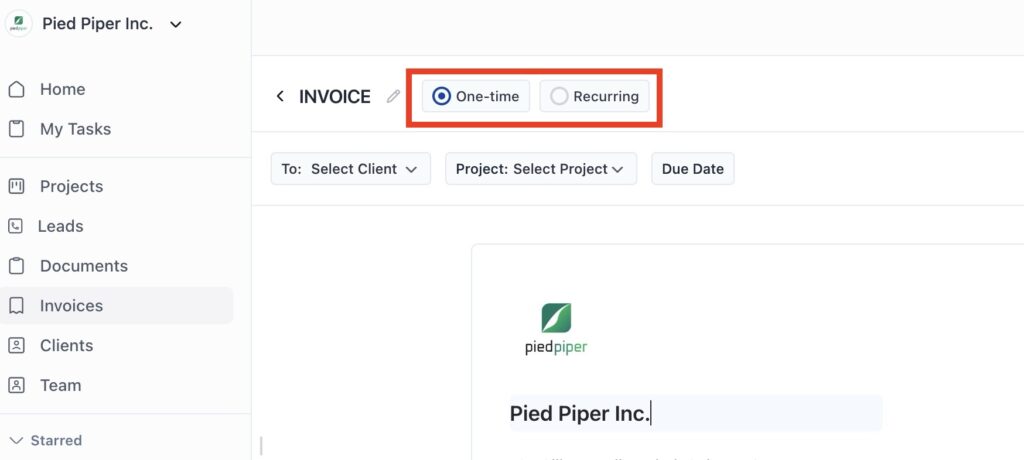
- One-time (selected by default) – For single billing
- Recurring – For ongoing services (Learn about recurring invoices →)
Keep One-time selected if you want to create ontime invoices.
Step 2: Set Invoice Basics #
Choose Your Client and Project #
In the top section, you’ll see three dropdown fields:
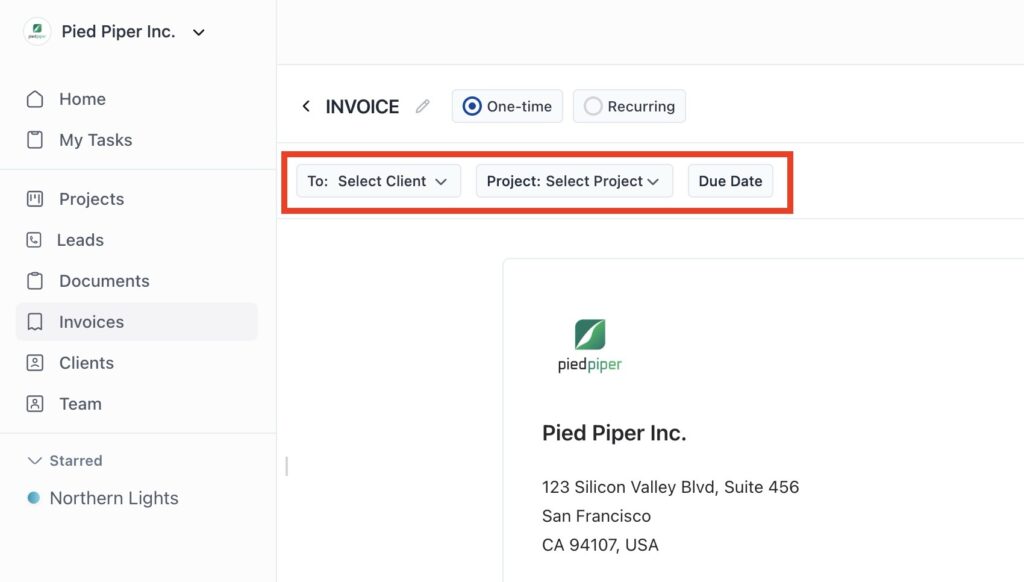
To: Select Client
- Click to choose an existing client. Use search feature for flexibility.
- Or select “Add New Client” if the client is not in the list.
Project: Select Project
- Link this invoice to a specific project (optional). Search and select the project from the dropdown.
- If the project is not found in the dropdown, add it from projects.
- Helps with organization and reporting
- Leave blank if not project-related
Due Date
- Click to open the date picker
- Choose from three options:
- Upon Receipt – Payment due immediately
- After [X] days of issue date – Standard net terms (15, 30, 60 days)
- Custom – Pick any specific date
💡 Common due date terms:
- Net 15: Payment due within 15 days
- Net 30: Payment due within 30 days
- Upon Receipt: Payment due immediately
Step 3: Review Your Business & Invoice Information #
Your invoice header shows your company details and invoice information automatically:

Left side (Your Business):
- Company logo (click to change)
- Business name and address
- Phone number (click to edit)
- Email address (click to edit)
Right side (Invoice Details):
- Issue date (today’s date, click to change)
- Invoice number (auto-generated, click to customize)
⚠️ Important: Your logo and contact details come from your global invoice settings. Changes here affect this invoice only.
Step 4: Add Client Information #
The client information is automatically pulled from your saved client data. If you need to make changes, just click on any field and update it.
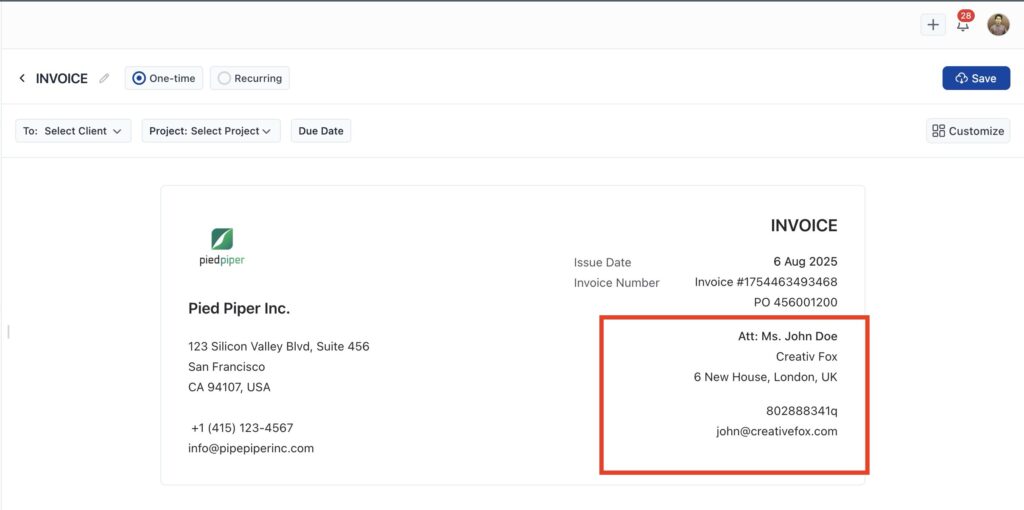
- Att: Client contact name (editable)
- Company Name (if applicable)
- Address and Email (both editable)
Click on any field to edit the information for this specific invoice.
Step 5: Customize Your Message #
Below the client information, you’ll see a greeting message:
Dear [client_name],

Please find below a cost-breakdown for the recent work completed.
Please make payment at your earliest convenience, and do not
hesitate to contact me with any questions.

Many thanks,
[Your Business Name]
To customize the message:
- Click anywhere in the text area
- Edit the greeting to match your tone
- The text editor toolbar lets you format text (bold, italic, lists, links).
💡 Tip: This greeting comes from your global invoice settings, but you can personalize it for each client.
Step 6: Add What You’re Billing For #
This is where you list the work you’ve done or products you’ve sold. Each row in the items table should describe something you’re charging for.
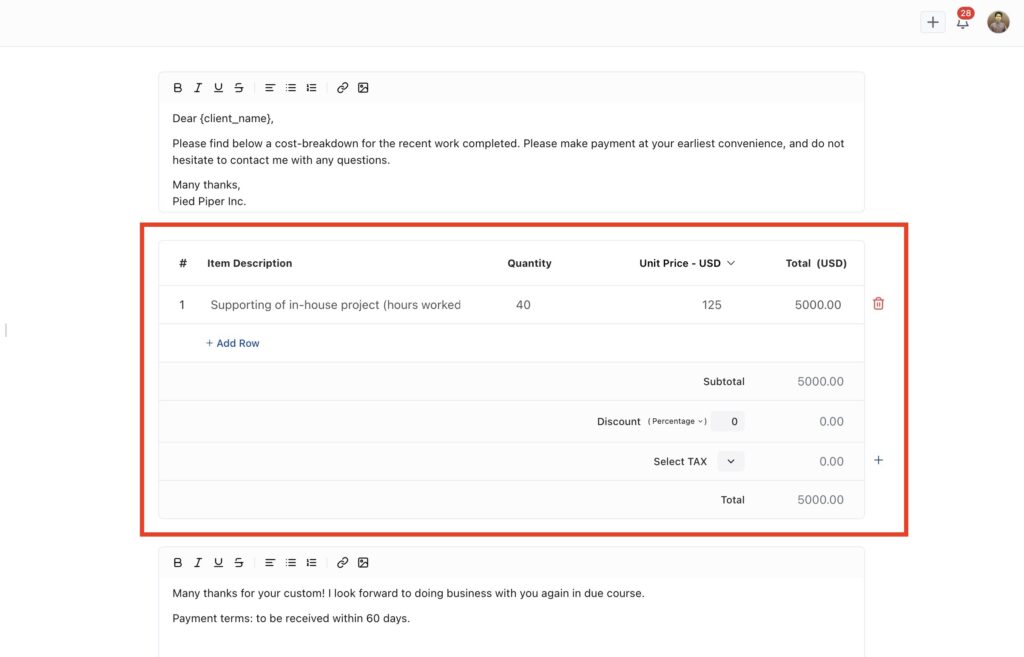
For Each Line Item: #
Item Description
- Describe the work completed or product sold
- Be specific: “Website design consultation” vs. “Consulting”
- Include dates or project phases if helpful
Example:
✅ “Website design – homepage & contact page”
❌ “Design”
Quantity
- Enter how many hours, items, or units you’re billing.
- Supports decimals (e.g., 2.5 hours)
Unit Price
- How much you charge per hour, item, or unit.
- Your currency is set to USD by default, but you can switch it from the dropdown if needed.
- The dropdown shows other available currencies
Total
- Automatically calculated (Quantity × Unit Price)
To Add More Items: #
Click + Add Row below the table to add additional line items.
Step 7: Review Totals and Apply Discounts or Tax #

Review the Subtotal #
This is the sum of all the line items you’ve added above. No action needed here unless you’re editing item rows.
Add Discount #
You can apply a discount if needed — either as a flat amount or a percentage.
Examples:
- Flat: $50 off
- Percentage: 10% off
Just choose the type and enter the amount. The total will update automatically.
Add Tax #
If taxes apply, select the appropriate tax from the dropdown.
These tax names and rates come from your global tax settings, so make sure they’re set up beforehand.
Example:
- VAT 15%
- Sales Tax 7%
You can apply multiple taxes if needed. To add multiple taxes, click the plus (+) button on the right.
Payment Terms #
At the bottom, you’ll see terms like:
Many thanks for your custom! I look forward to doing business
with you again in due course.

Payment terms: to be received within 60 days.
These come from your global terms settings but can be edited for this specific invoice.
Step 8: Configure Invoice Options #
Click the Customize button on the right to open advanced options:
Setup Options (Toggle On/Off): #
- Apply TAX: Include tax calculations
- Greetings message: Show/hide the client greeting
- Terms: Include payment terms
- Payment methods: Show accepted payment options
Online Payment Methods: #
Enable clients to pay online directly from the invoice:
- Stripe – Credit/debit cards
- PayPal – PayPal account or cards
- QuickPay – Various payment options
- Razorpay – Multiple payment methods
💡 Tip: Online payments get you paid faster! Set up your preferred payment methods in Payment Settings.
Step 9: Save Your Invoice #
- Click the Save button in the top-right corner
- Your invoice is now saved as a draft
- You’ll see a confirmation message
- A Share option will appear next to the Save button
What Happens Next? #
After saving, you can:
📤 Send Your Invoice
- Click Share to email it to your client
- Learn how to send and track invoices →
📄 Download PDF
- Get a PDF copy for your records
- Attach to your own emails if preferred
✏️ Make Changes
- Edit the invoice anytime before sending
- Changes are saved automatically