Automate your regular billing and never miss invoicing a client again. Set up recurring invoices to send professional, consistent bills automatically for retainers, subscriptions, and ongoing services.
When to Use Recurring Invoices #
Recurring invoices work perfectly for:
- Monthly retainer agreements – Marketing, consulting, or maintenance services
- Subscription-based services – Software, hosting, or membership fees
- Regular maintenance contracts – IT support, cleaning services, or equipment maintenance
- Weekly or bi-weekly services – Content creation, bookkeeping, or ongoing projects
- Quarterly consulting fees – Strategic planning or advisory services
Before You Start #
Make sure you have:
- Client information added to OneSuite
- Your regular service details and pricing determined
- Your business information set up in Invoice Settings
- Payment terms and methods configured
Step 1: Create Your Recurring Invoice #
Start the Invoice Creation Process #
1. Navigate to Invoices in your left sidebar
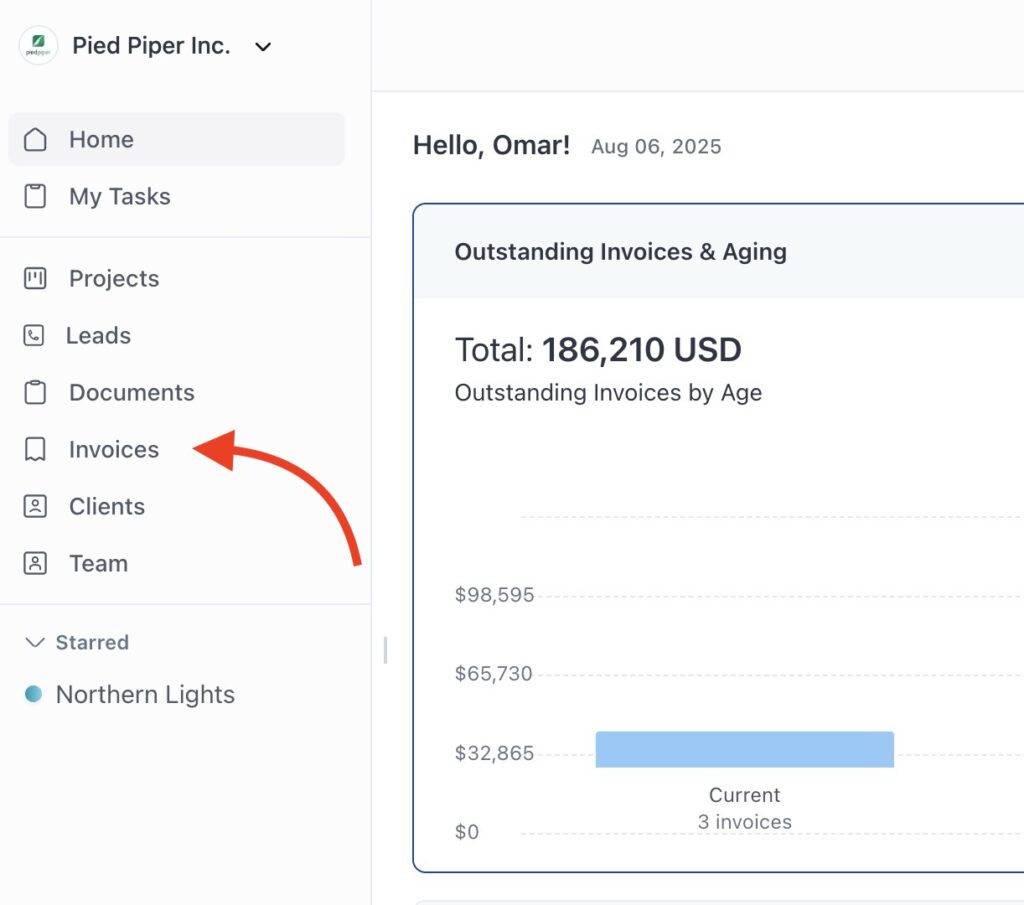
2. Click the Create New button in the top-left corner

3. Select “Recurring” instead of the default “One-time” option
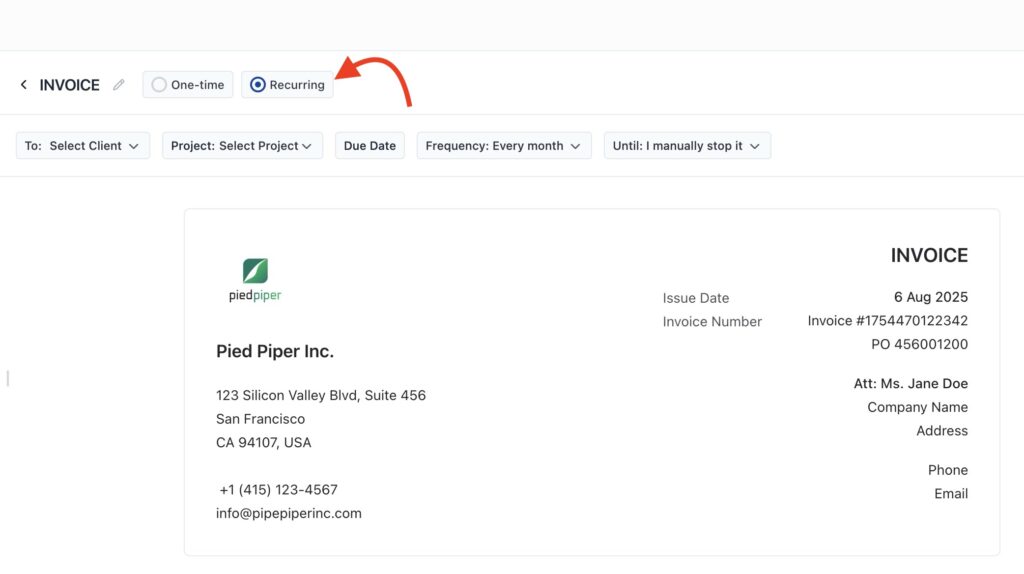
You’ll see the invoice creation page with recurring-specific options that don’t appear for one-time invoices.
Set Invoice Basics #
Choose Your Client and Project
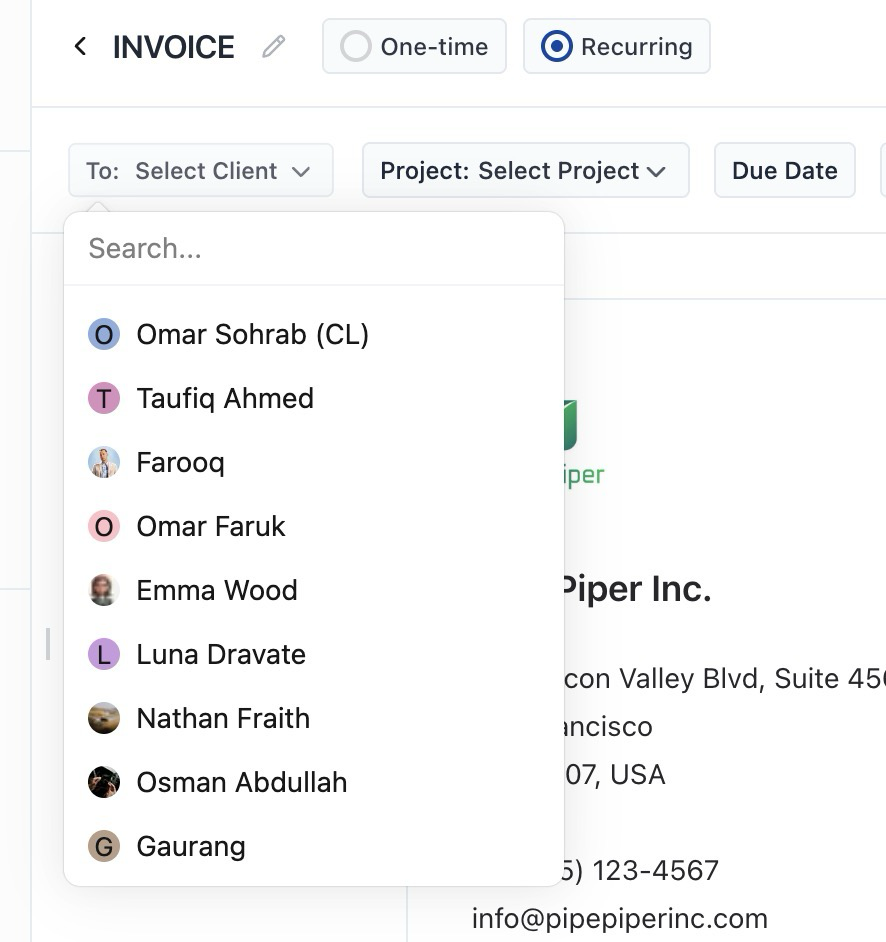
In the top section, configure:
- To: Select Client – Choose the client who will receive recurring invoices (this client will get every automated invoice in the series)
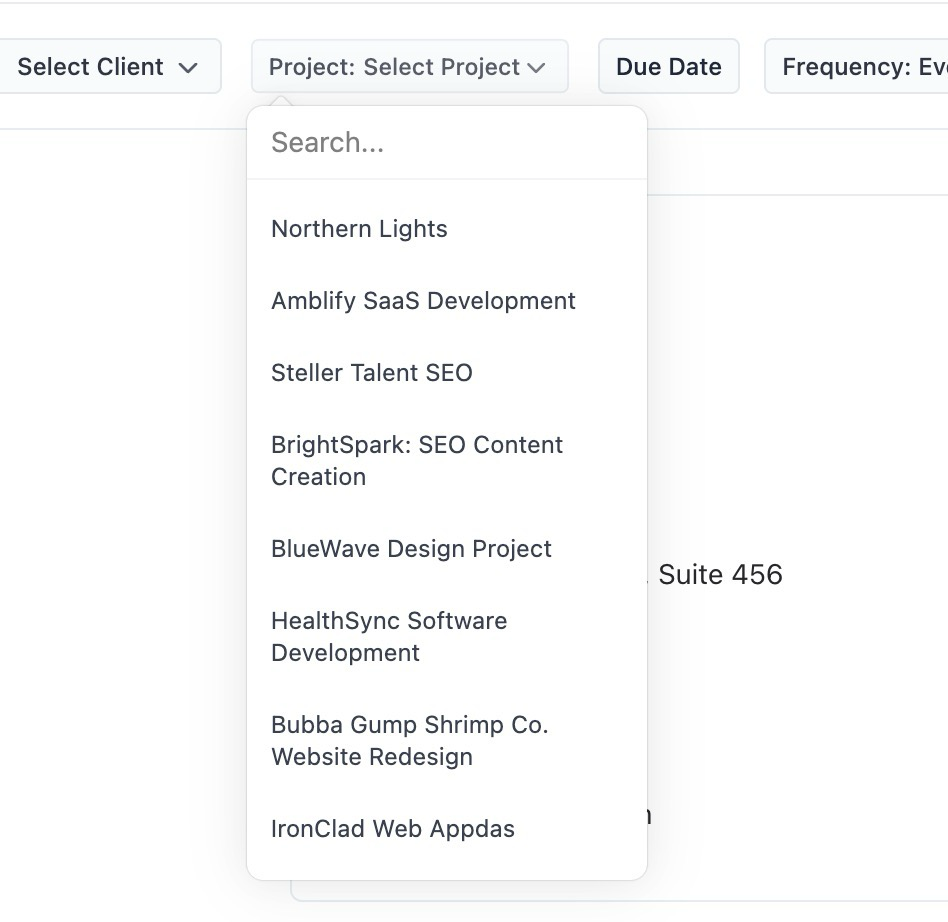
- Project: Select Project – Link to a specific project if applicable, or leave blank for general recurring services
Set Due Date Terms
Choose when each invoice should be due (applies to every invoice in the recurring series):
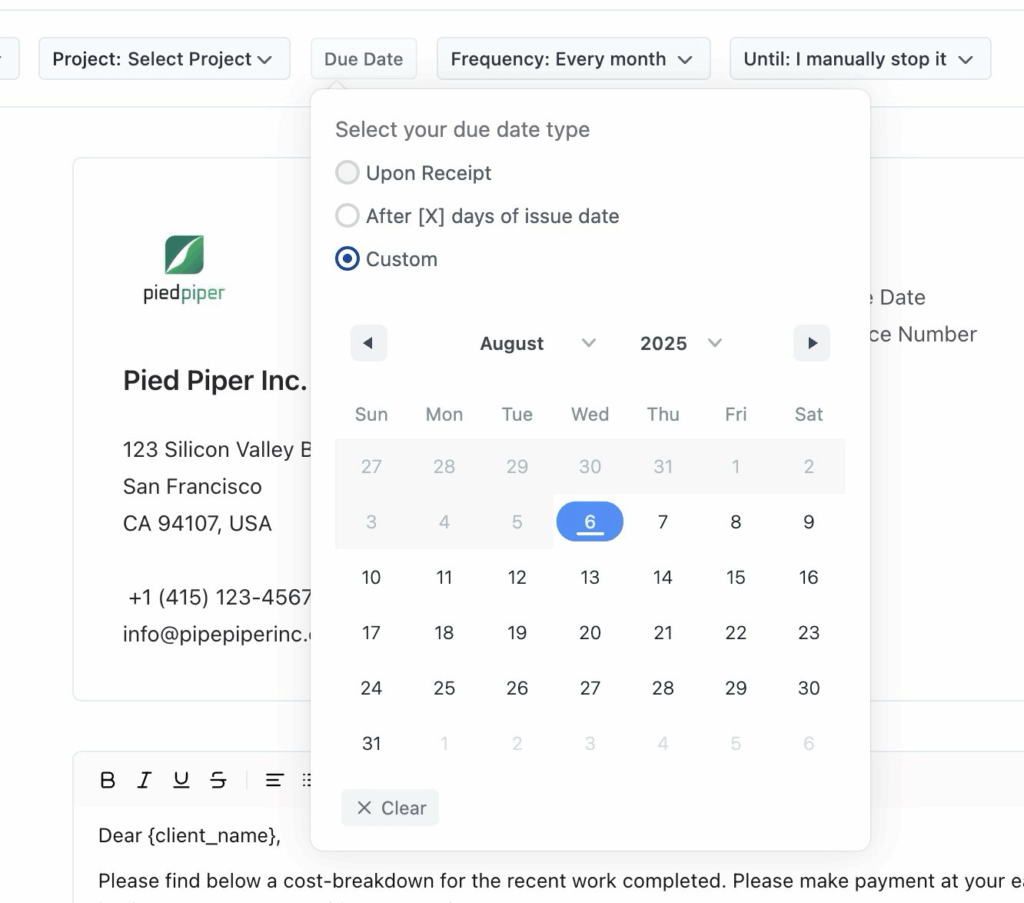
- Upon Receipt – Payment due immediately
- After [X] days of issue date – Standard net terms (15, 30, 60 days)
- Custom – Pick a specific number of days
Step 2: Configure Your Recurring Schedule #
Set Invoice Frequency #
Click the Frequency dropdown to choose how often invoices are sent:
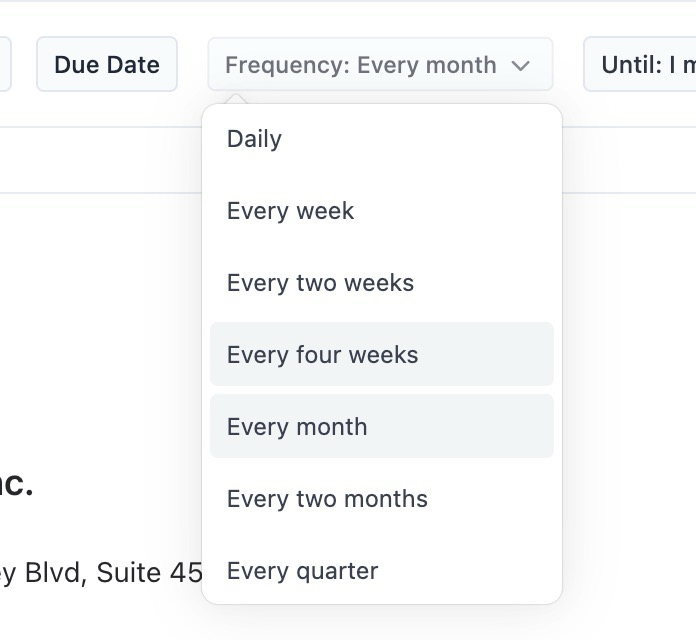
- Daily – Every day (rare, for specialized services)
- Every week – Weekly billing
- Every two weeks – Bi-weekly services
- Every four weeks – Monthly alternative
- Every month – Most common for retainers
- Every two months – Bi-monthly billing
- Every quarter – Quarterly services
- Every Year – Yearly Billing Cycle
💡 Most popular choices:
- Every month for monthly retainers
- Every week for weekly services
- Every quarter for quarterly consulting
Set End Conditions #
Click the Until dropdown to determine when recurring invoices stop:
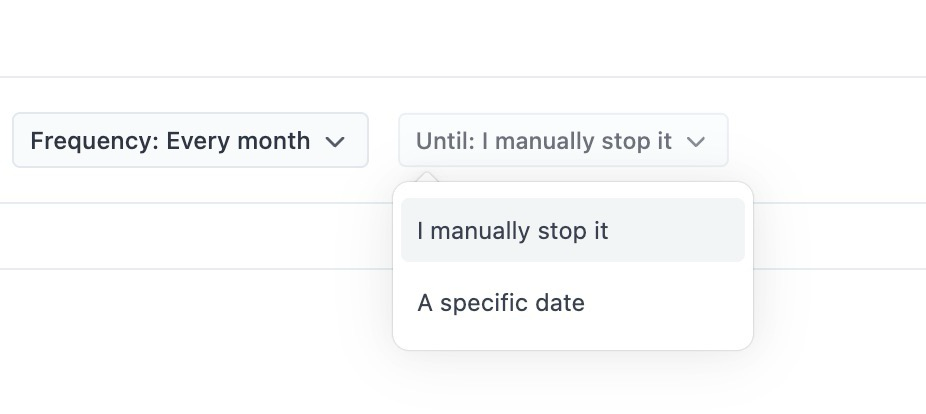
I manually stop it
- Invoices continue indefinitely until you pause or stop them
- Best for ongoing relationships without defined end dates
- You maintain full control over when to stop
A specific date
Choose this when you have a contract with a defined end date, like a 6-month consulting agreement or annual service contract. The calendar picker lets you select exactly when you want the final invoice to be sent, ensuring your billing aligns perfectly with your contract terms.
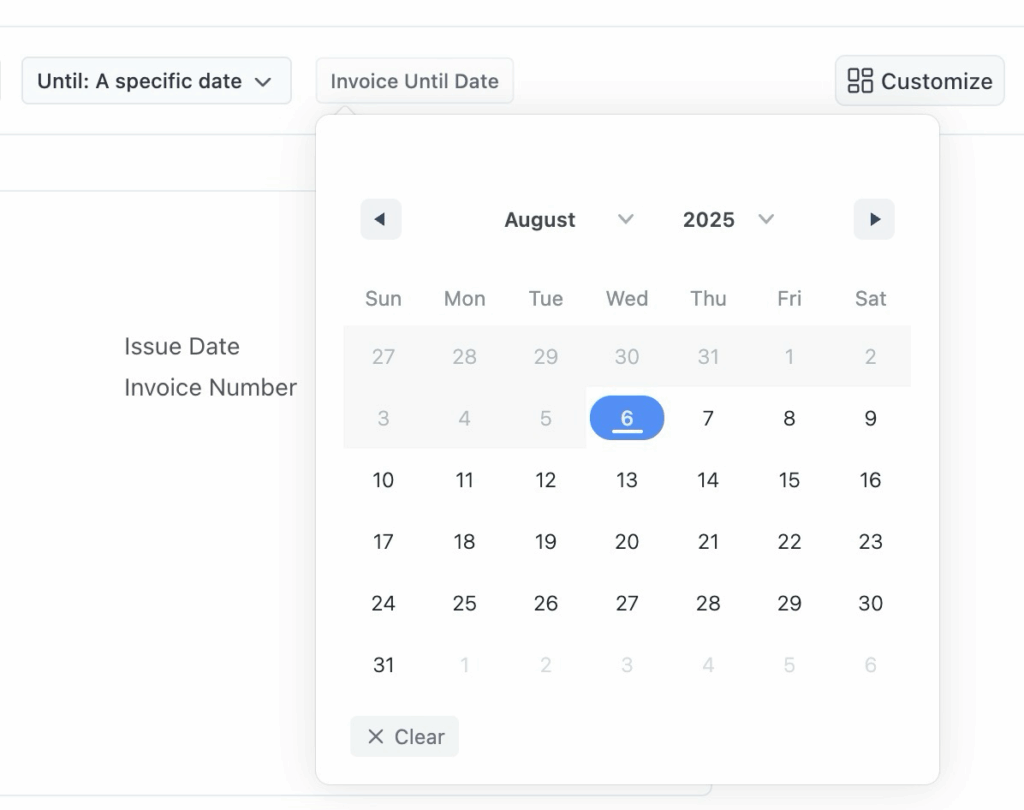
When you select “A specific date”:
- Click Invoice Until Date field
- Calendar picker opens showing current month/year
- Navigate to desired month and year using arrows
- Click on the specific date when invoices should stop
- Click Clear if you need to remove the selected date
Step 3: Set Up Your Invoice #
Review Business Information #
Your invoice header displays your company details automatically:

Left side (Your Business):
- Company logo (click to change for this series)
- Business name and address
- Phone number and email address (click to edit)
Right side (Invoice Details):
- Issue date (starting date for the series)
- Invoice number (template for all invoices in series)
⚠️ Important: Changes to business information here affect only this recurring invoice series, not your global settings.
Configure Client Information #
The right side shows your client’s details:
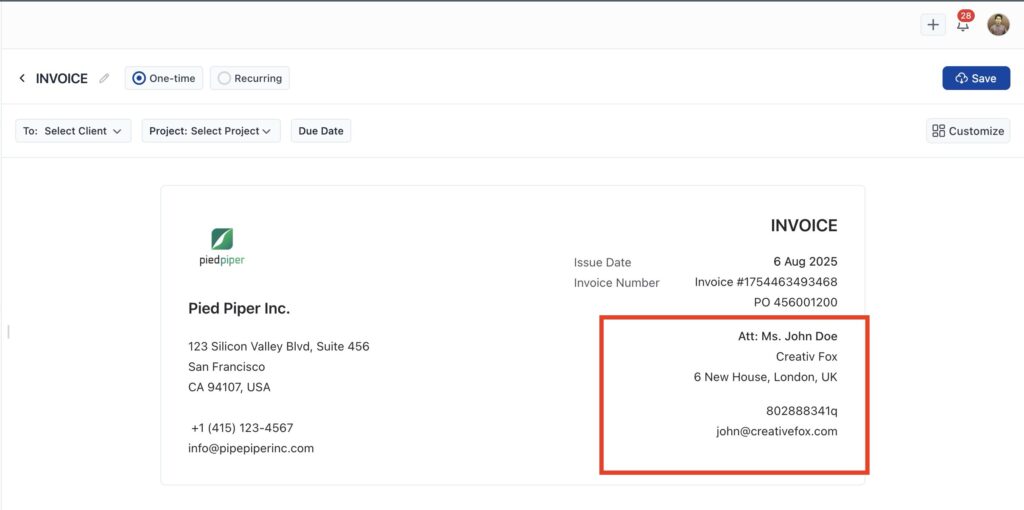
- Att: Primary contact name (editable)
- Company Name and Address
- Email address for invoice delivery
These details will be used for every invoice in the recurring series. Make sure they’re accurate since automated invoices will be sent to this information.
Customize Your Message #
Below the client information, you’ll see a greeting message:
Dear [client_name],

Please find below a cost-breakdown for the recent work completed.
Please make payment at your earliest convenience, and do not
hesitate to contact me with any questions.

Many thanks,
[Your Business Name]
To customize the message:
- Click anywhere in the text area
- Edit the greeting to match your tone
- The text editor toolbar lets you format text (bold, italic, lists, links).
💡 Tip: This greeting comes from your global invoice settings, but you can personalize it for each client.
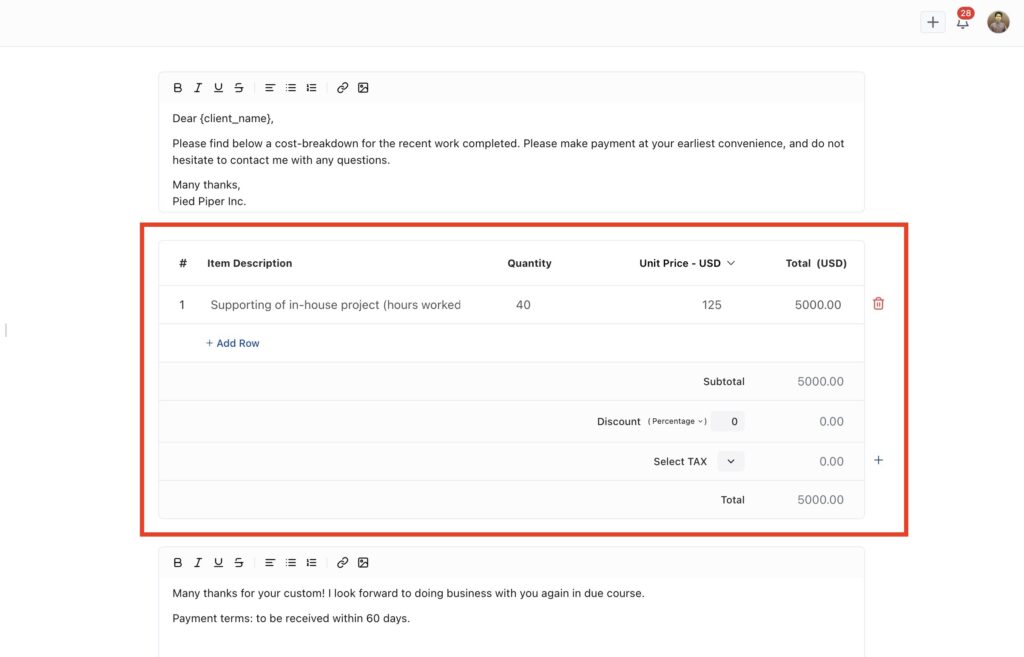
Step 4: Add Your Service Items #
Add What You’re Billing For #
his is where you list the work you’ve done or products you’ve sold. Each row in the items table should describe something you’re charging for.
For Each Line Item: #
Item Description
- Describe the work completed or product sold
- Be specific: “Website design consultation” vs. “Consulting”
- Include dates or project phases if helpful
Example:
✅ “Website design – homepage & contact page”
❌ “Design”
Quantity
- Enter how many hours, items, or units you’re billing.
- Supports decimals (e.g., 2.5 hours)
Unit Price
- How much you charge per hour, item, or unit.
- Your currency is set to USD by default, but you can switch it from the dropdown if needed.
- The dropdown shows other available currencies
Total
- Automatically calculated (Quantity × Unit Price)
To Add More Items: #
Click + Add Row below the table to add additional line items.
Step 5: Review Totals and Apply Discounts or Tax #

Review the Subtotal #
This is the sum of all the line items you’ve added above. No action needed here unless you’re editing item rows.
Add Discount #
You can apply a discount if needed — either as a flat amount or a percentage.
Examples:
- Flat: $50 off
- Percentage: 10% off
Just choose the type and enter the amount. The total will update automatically.
Add Tax #
If taxes apply, select the appropriate tax from the dropdown.
These tax names and rates come from your global tax settings, so make sure they’re set up beforehand.
Example:
- VAT 15%
- Sales Tax 7%
You can apply multiple taxes if needed. To add multiple taxes, click the plus (+) button on the right.
Payment Terms #
At the bottom, you’ll see terms like:
Many thanks for your custom! I look forward to doing business
with you again in due course.

Payment terms: to be received within 60 days.
These come from your global terms settings but can be edited for this specific invoice.
Step 6: Configure Invoice Options #
Click the Customize button on the right to open advanced options:
Setup Options (Toggle On/Off): #
- Apply TAX: Include tax calculations
- Greetings message: Show/hide the client greeting
- Terms: Include payment terms
- Payment methods: Show accepted payment options
Online Payment Methods: #
Enable clients to pay online directly from the invoice:
- Stripe – Credit/debit cards
- PayPal – PayPal account or cards
- QuickPay – Various payment options
- Razorpay – Multiple payment methods
💡 Tip: Online payments get you paid faster! Set up your preferred payment methods in Payment Settings.
Step 7: Save Your Invoice #
- A Share option will appear next to the Save button
- Click the Save button in the top-right corner
- Your invoice is now saved as a draft
- You’ll see a confirmation message
Next Steps #
Ready to start billing automatically?
- Send and track your invoices → to manage the invoices as they’re generated
Need to handle one-off billing too?
- Create your first invoice → for non-recurring work
Looking to optimize payment collection?
- Add online payment methods → for faster recurring payments
- Set up direct bank transfer → If you don’t have access to payment processors.