Before you send your first invoice, it’s a good idea to set up your invoice preferences. This ensures that every invoice you create automatically includes the right taxes, payment options, terms, and branding.
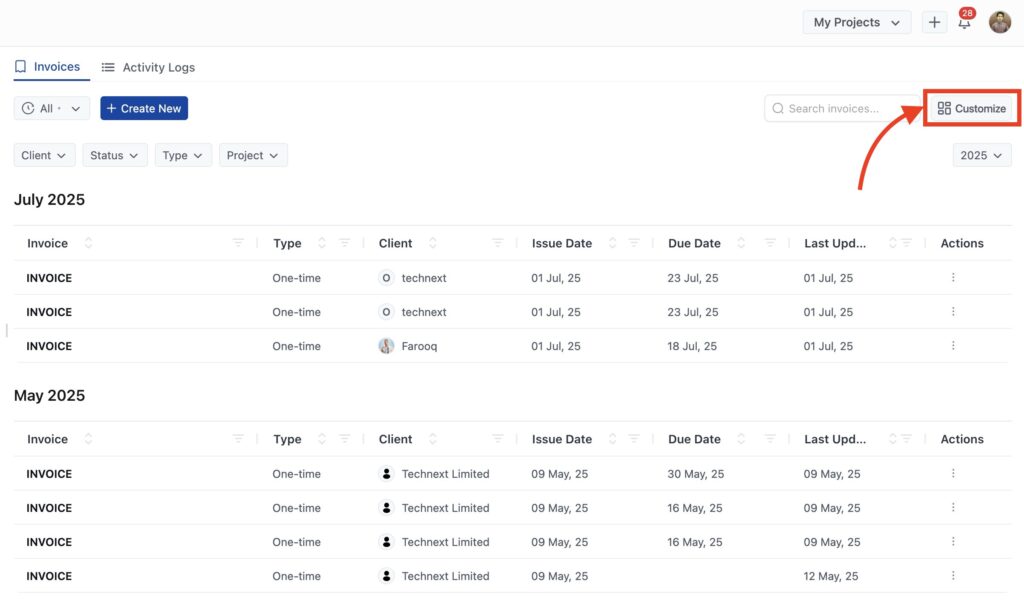
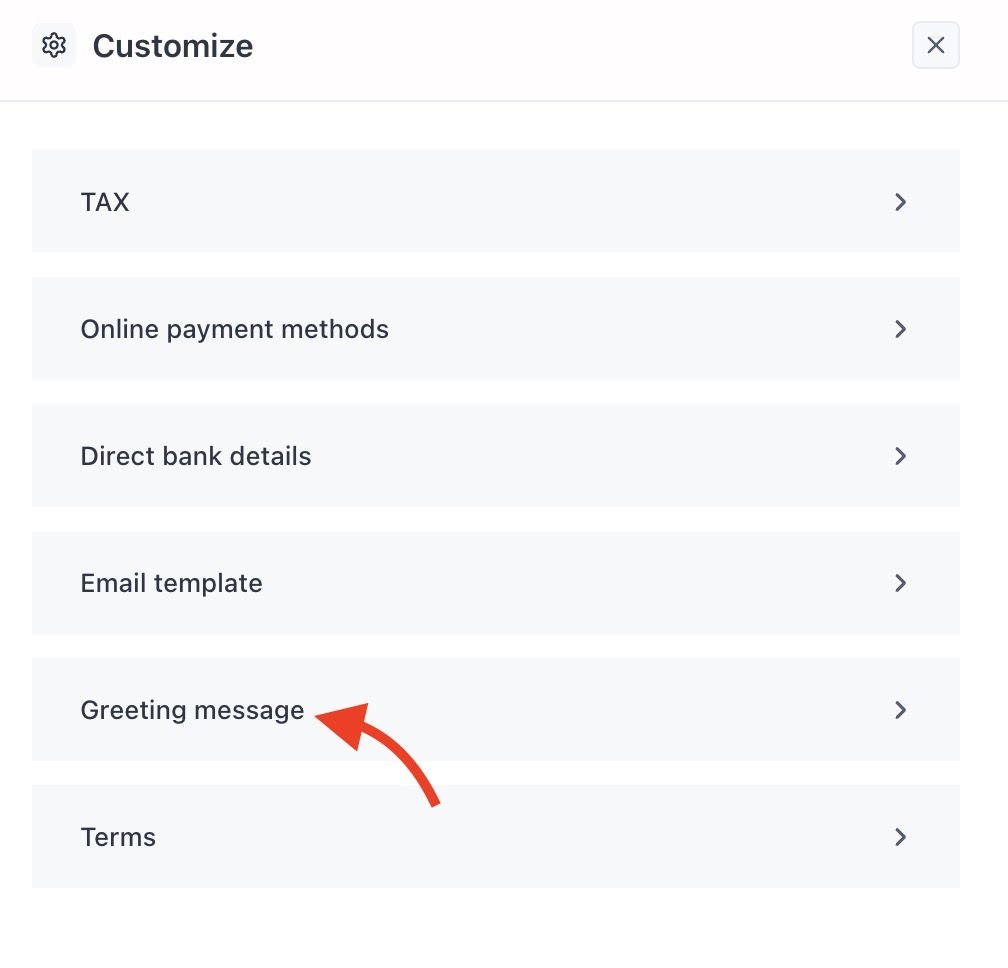
All settings can be accessed by clicking the Customize button at the top-right corner of the Invoice Home.
To access all the invoice customization:
- Go to Invoice Home or Estimate Home
- Click the Customize button (top right)
Here’s what you can configure:
Standard tax rates #
If your business charges tax—like Sales Tax, VAT, or Service Tax—you can set them up once and reuse them across all invoices and estimates. OneSuite allows you to create multiple tax types and apply them to any document as needed.
This helps you:
- Deliver clean, professional invoices with tax breakdowns
- Avoid manual tax entry every time
- Stay compliant with regional requirements
How to add a tax rate:
- Select the TAX tab from the Customize.

- Click + Add New to add one or more tax types (e.g., “NY Sales Tax – 8.875%” or “VAT – 15%”)
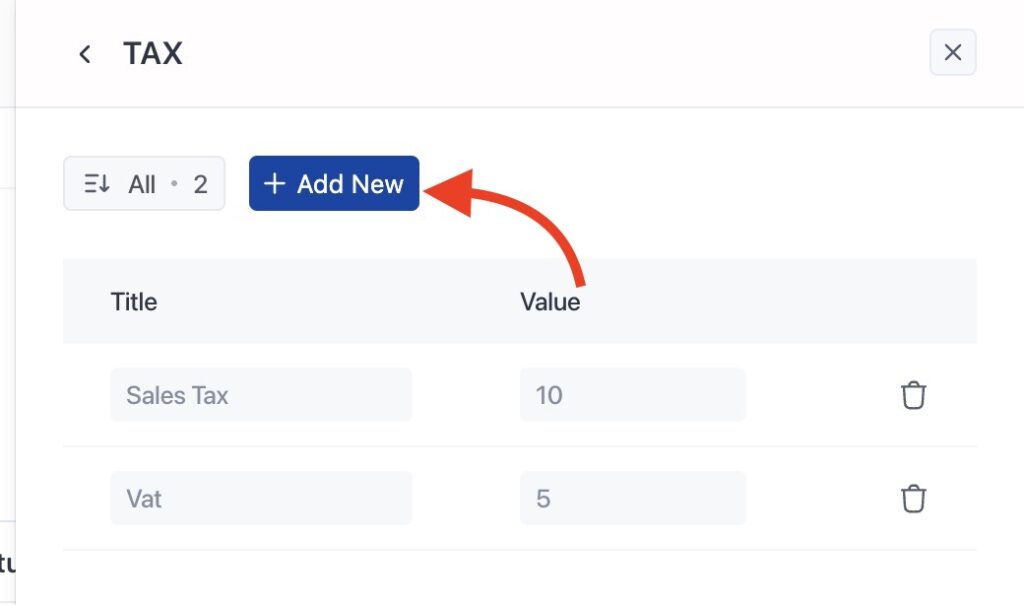
- Enter:
- A Tax Title (e.g., “Sales Tax” or “VAT”)
- A Percentage (e.g.,
10for 10%)
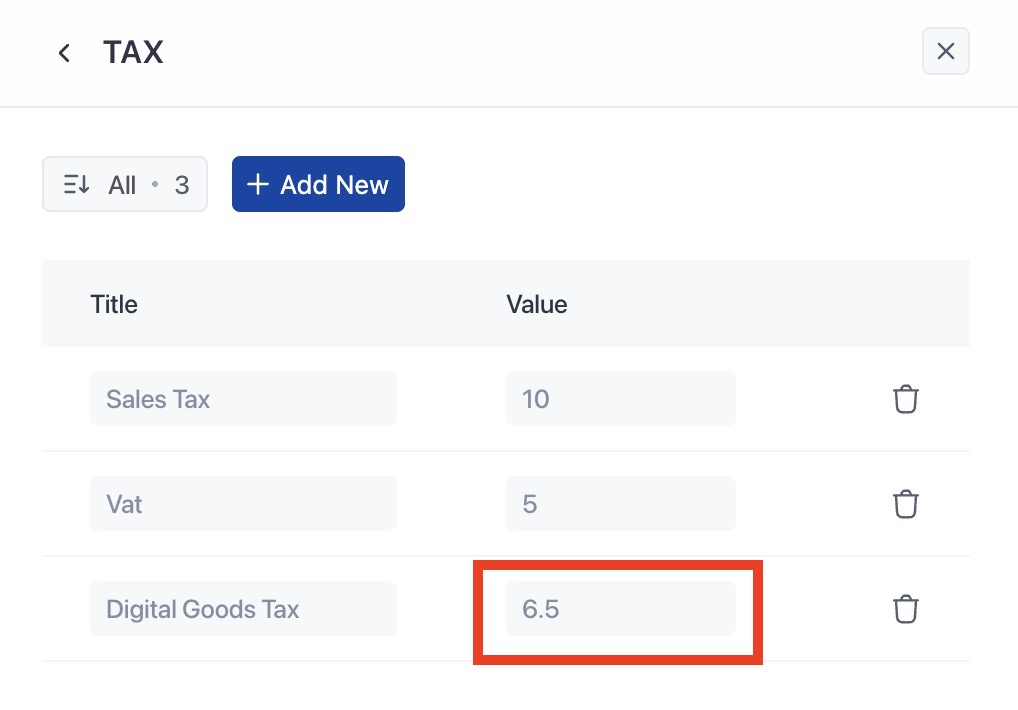
- Click outside the field to save
You can add as many tax categories as you need. These rates will be available whenever you create an invoice or estimate.
You can also apply multiple taxes to the same document. For example, apply both State Sales Tax and Local Tax to a single invoice.
📘 For step-by-step instructions with screenshots, see:
👉 How to set taxes on your invoices
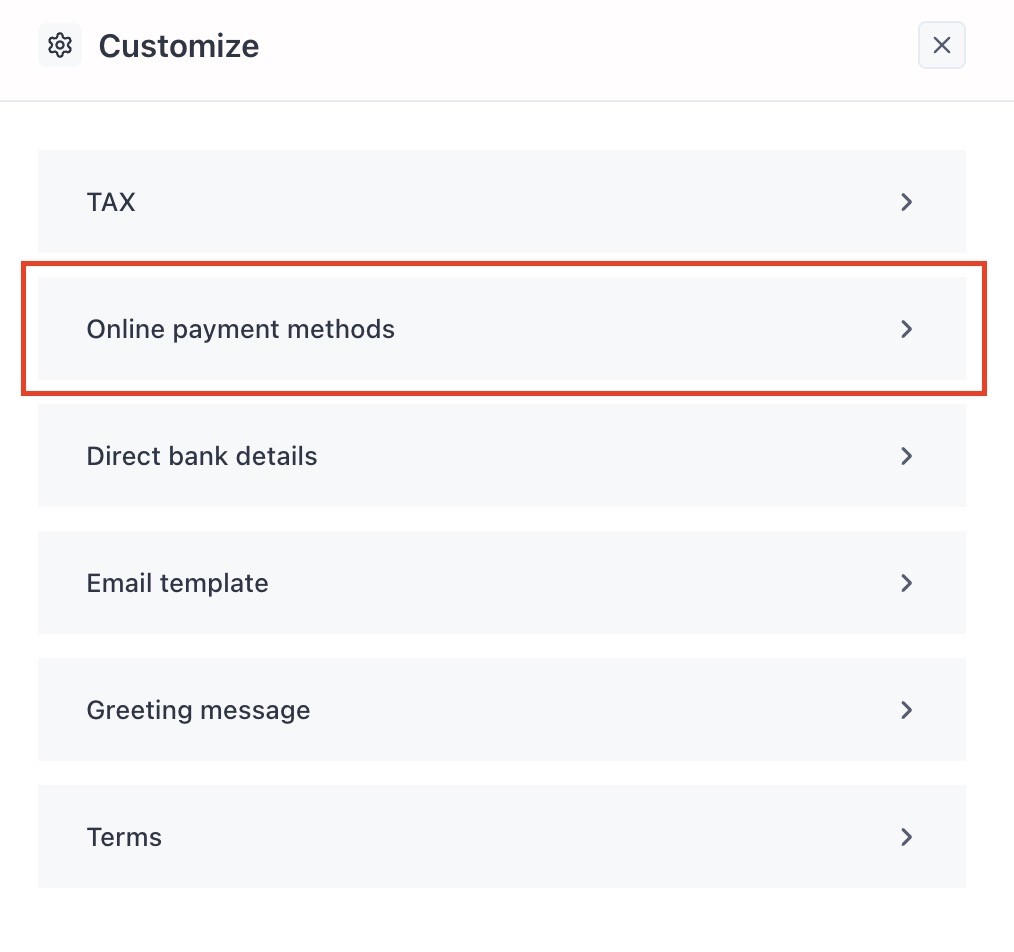
Enable online payment methods #
Let clients pay you instantly using secure, integrated payment gateways. OneSuite supports multiple options, including:
- Stripe
- PayPal
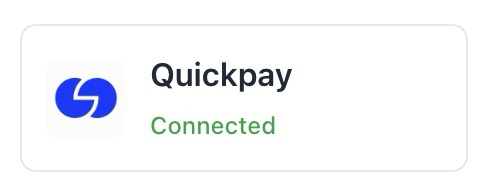
- QuickPay
- Razorpay
- HitPay
- CHIP
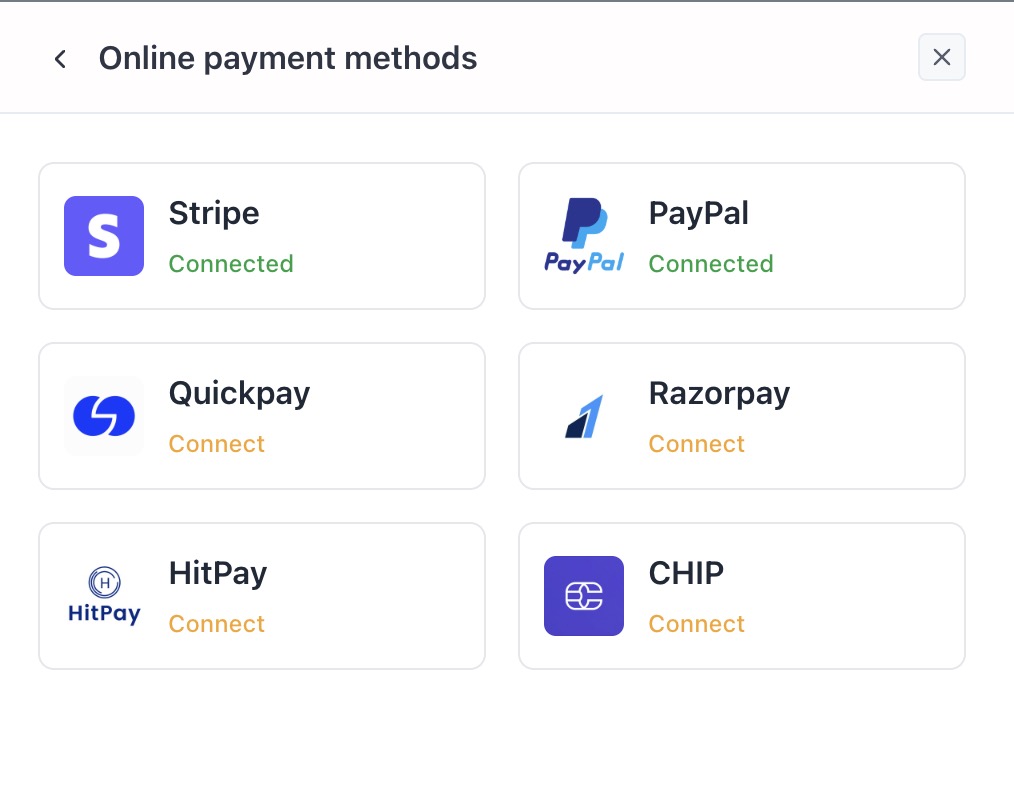
You can connect one or more providers, and your clients will see Pay Now buttons for all active options.
How to connect a provider: #
- In the Customize panel, click Online payment methods
- Click Connect next to your chosen provider
- Paste your credentials (e.g., Secret API Key, for this example im using QuickPay)
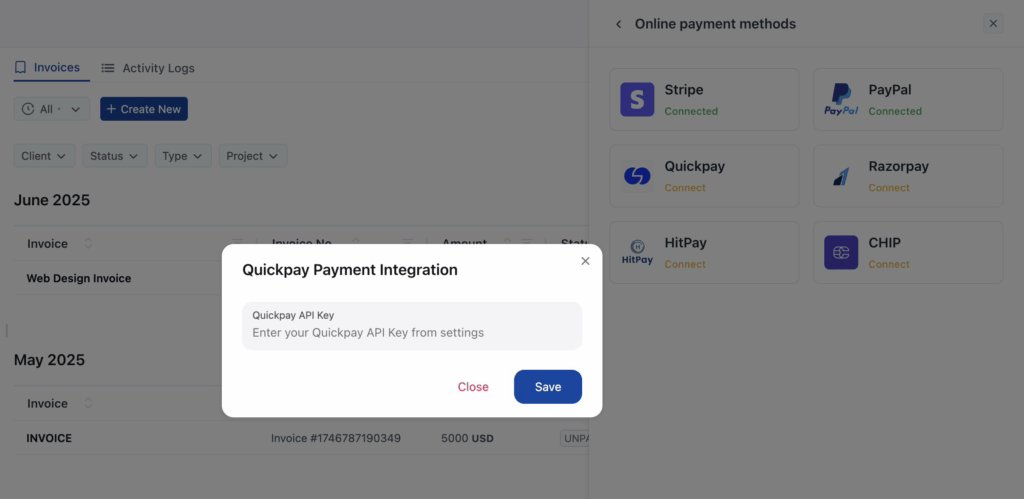
- Click Save
🔐 Use your secret key, not the public key (especially for Stripe and Razorpay).
Direct Bank Transfer #
If you also accept payments via manual bank transfers, you can add your bank account details. These will be shown at the bottom of the client-facing invoice under the Direct Bank Details section.
This helps when:
- Clients prefer offline or international payments
- Payment gateways are not supported in your client’s region.
- You don’t have any payment gateways.
How to add bank details #
- Open the Customize panel
- Go to the Direct Bank Details tab

- Enter:
- Bank Name
- Account Holder Name
- Account Number or IBAN
- SWIFT/BIC Code
- Any custom payment instructions
Example:
Bank Name: Bank of America
Account Holder: Smith Creative Agency LLC
Account Number: 9876543210
SWIFT Code: BOFAUS3N
Instructions: Please include the invoice number as the payment reference.
- Click Save
📘 See also:
👉 How to add bank transfer instructions
Invoice Email Template #
When you share an invoice via email, OneSuite uses a default message. You can personalize the default email that gets sent when you share an invoice with a client.
This helps you:
- Personalize communications with clients
- Add context or instructions
- Standardize messaging across your team
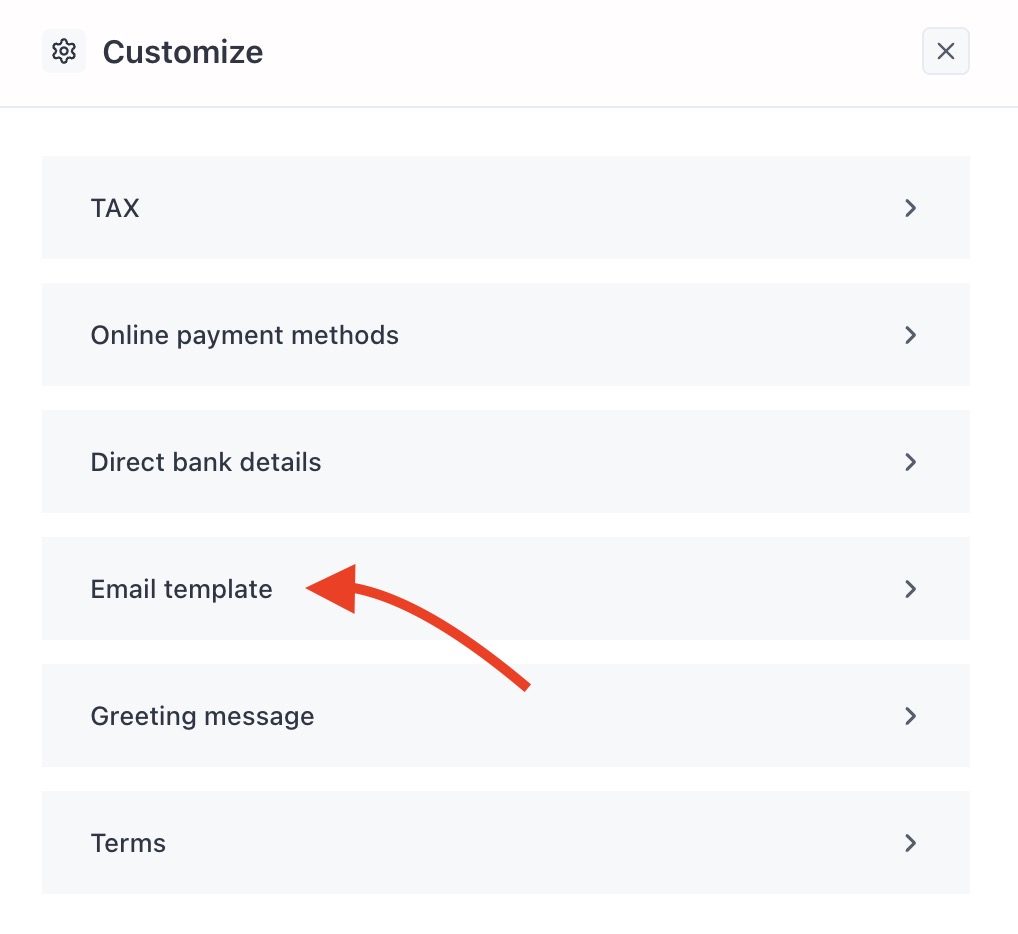
How to customize the invoice email template #
- Open the Customize panel
- Go to the Email Template tab
After clicking on Email template from the Customize panel:
- Edit the message to match your tone and brand
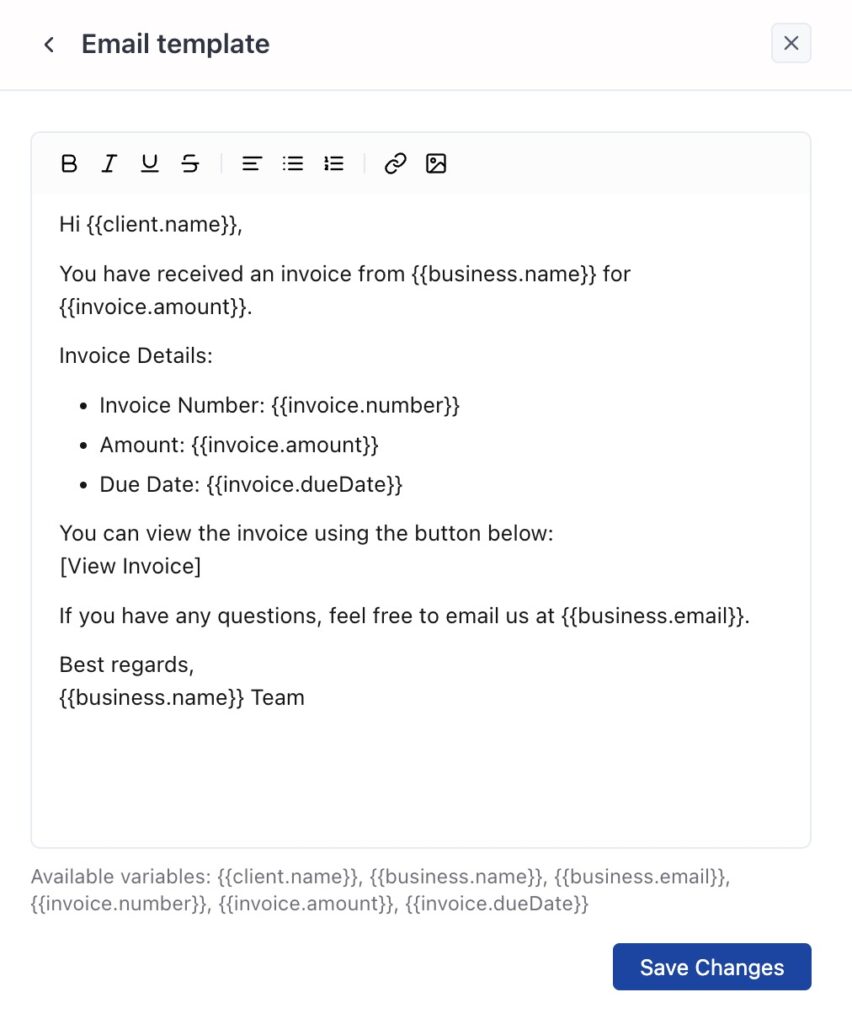
- Use the available variables to dynamically insert data:
{{client.name}}— Client’s full name{{business.name}}— Your business name{{business.email}}— Your support email{{invoice.amount}}— Invoice total{{invoice.number}}— Invoice number{{invoice.dueDate}}— Due date of the invoice
- When you’re happy with the text, click Save Changes
📌 Make sure to leave the variables exactly as shown (with double curly brackets {{ }}) — they will automatically populate with real values when sent.
Greeting Message #
The Greeting Message appears at the top of the invoice—just below the client and company information, and above the message box and itemized section. This is a great place to add a personal touch, express gratitude, or include payment instructions.
Use it to:
- Thank the client for their business
- Reiterate payment expectations or timelines
- Share a warm message in your brand’s voice
How to add or edit the greeting message #
- Open the Customize panel from Invoice Home
- Click the Greeting Message tab
- Type your message in the text editor
- You can include placeholders like:
{client_name}– automatically adds your client’s name{business_name}– automatically adds your business name

- Click Save
Once added, the greeting will automatically appear on all new invoices you create.
Terms #
The Terms section appears at the very bottom of each invoice, below the itemized list and total breakdown. It’s ideal for sharing payment deadlines, refund policies, or any legal disclaimers that you want the client to see before paying.
Use this section to:
- Set expectations like “Payment due in 30 days”
- Mention late fees or penalties
- Include a link or summary of your refund policy
- Add jurisdiction-specific disclaimers or notes
How to set your default invoice terms #
- From Invoice Home, click the Customize button in the top-right.
- Select the Terms tab.
- Write your custom terms in the rich text editor.
Example: “Payment is due within 15 days from the invoice date. A 3% late fee will be added for each additional week past the due date.”

- Click Save Changes.
Once saved, these terms will appear at the bottom of every invoice, just below the total amount.