Some clients prefer—or require—paying via bank transfer instead of using online gateways. In other cases, the service provider may not have access to online processors like Stripe or PayPal due to regional or compliance restrictions.
In OneSuite, you can easily add your bank account details to invoices so clients can make manual payments through their bank.
Why/when use bank transfer? #
You may choose to accept bank transfers when:
- Your client doesn’t use online payment gateways
- You don’t have access to services like Stripe, PayPal, or Razorpay
- You’re working with international clients who prefer SWIFT/IBAN
- Your invoices are large-value or handled by accounting teams
Bank transfers are processed outside of OneSuite. But including clear payment instructions on the invoice ensures your client knows how and where to pay.
Where does this appear on the invoice #
Your client will see the “Direct Bank Details” section on the right-hand side of the invoice, under the online payment methods (if any are connected).
If no information is added, the section displays:
“No bank details found”
How to add your bank details #
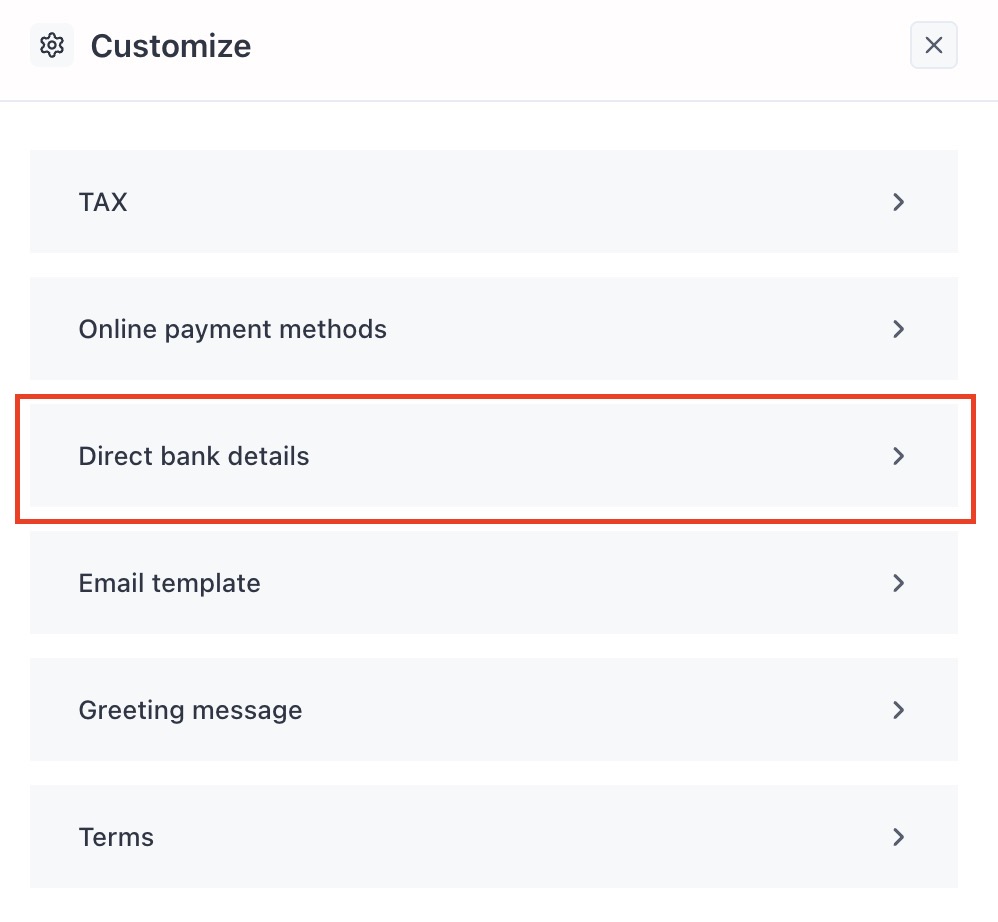
To begin adding your bank details, go to the Invoice Home screen and click the Customize button in the top-right corner.
From the Customize panel, click on the Direct bank details option to open the bank info setup screen.
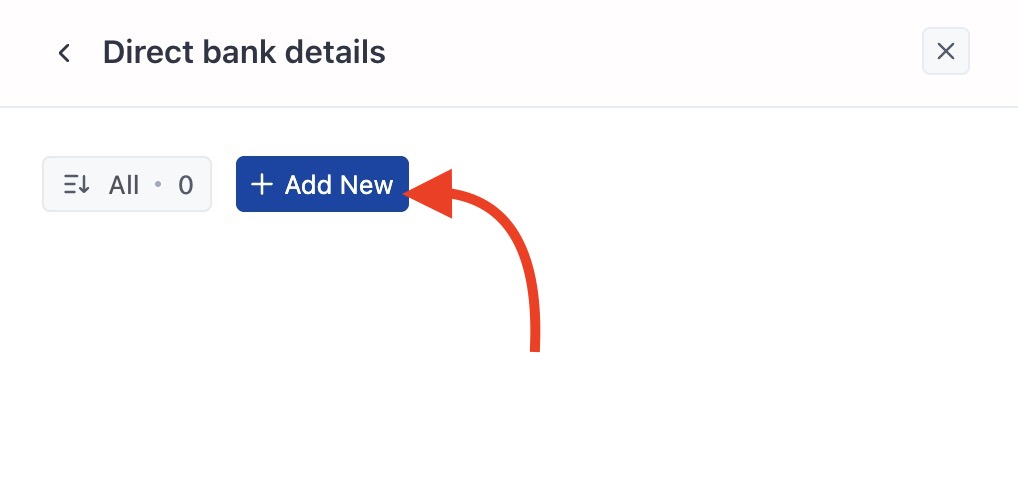
On the Direct Bank Details screen, click the + Add New button to create a new entryImage Title:
A popup will appear where you can input:
- The Bank Name
- Any additional Bank Details, such as account number, IBAN, SWIFT code, and payment instructions
Example:
| Field | Example |
|---|---|
| Bank Name | HSBC or Bank of America |
| Account Holder Name | Smith Creative Agency LLC |
| Account Number / IBAN | 1234567890 or DE89370400440532013000 |
| SWIFT / BIC Code | BOFAUS3NXXX |
| Payment Instructions | “Include invoice number in reference.” or “Pay in USD only.” |
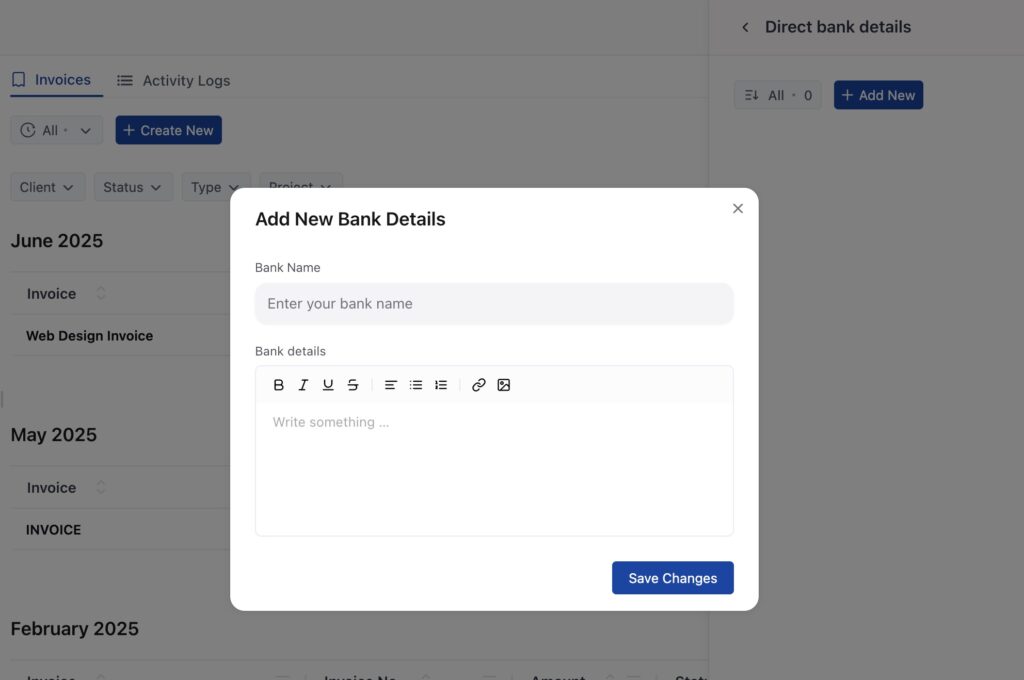
Once done, click Save Changes. Your bank info will now be displayed under Direct Bank Details.
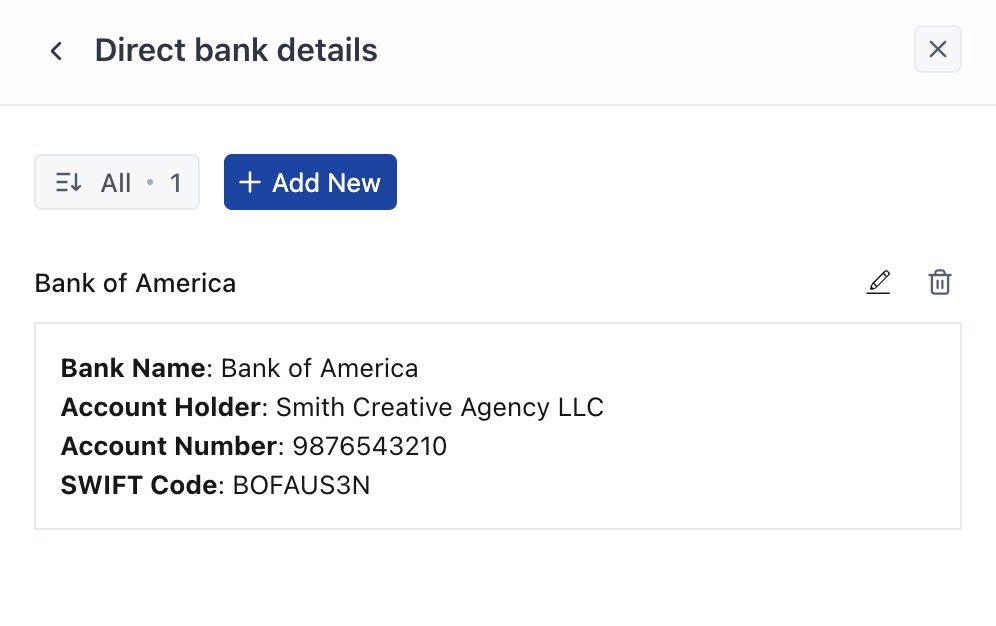
To make changes later, use the pencil (edit) icon or trash (delete) icon beside each saved entry.
How it works (for your client) #
Here’s how a client uses your bank details to pay:
- They open the invoice you sent
- Under Make Payment, they scroll down to the Direct Bank Details section
- They open their online banking app or portal
- They initiate a wire/bank transfer using the account info shown
- They include the invoice number in the transfer reference (if you’ve requested this)
📝 Reminder: Since OneSuite does not process the payment itself, no notification is sent when the transfer is made. You’ll need to track this manually.
Tracking direct bank transfer payments #
There’s currently no automatic detection for payments made via manual transfer. You’ll need to monitor your bank account and mark the invoice as paid once funds are received.
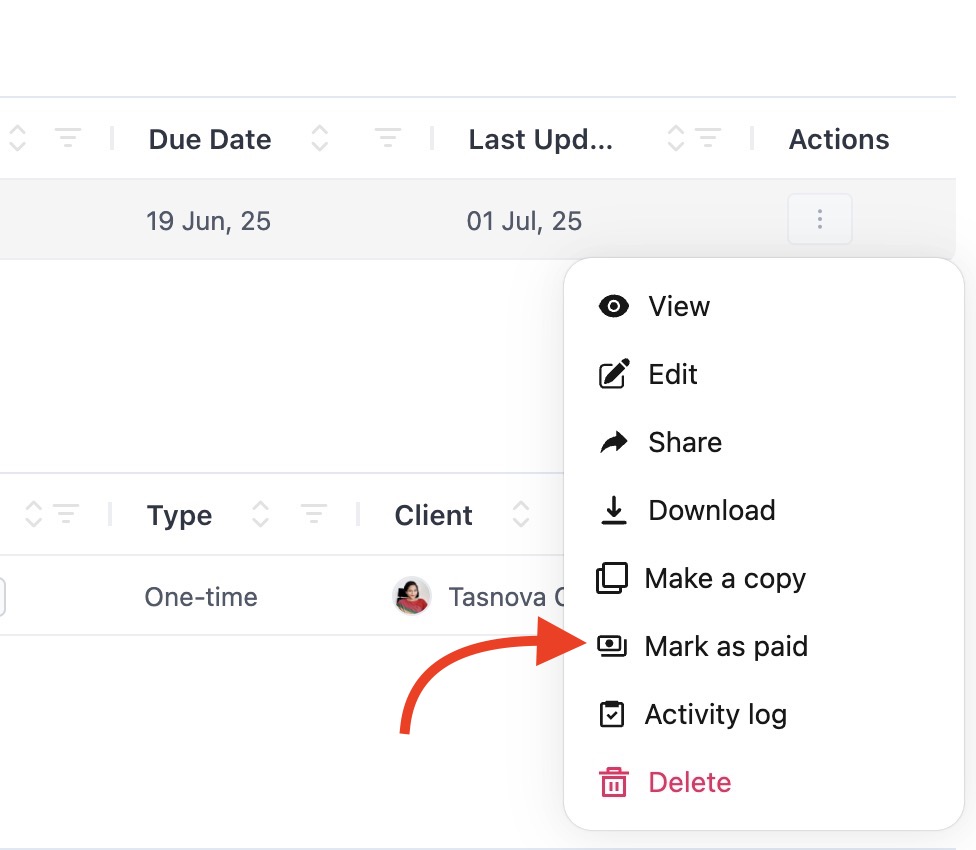
How to track and mark as paid:
- When you receive payment in your bank account, open the invoice in OneSuite
- Click the 3-dot actions menu next to the invoice

- Select “Mark as Paid”
Tips for a better client experience #
- Add a clear payment instruction like “Include invoice number in reference”
- Confirm currency compatibility for international transfers
- Mention expected timelines (e.g., “Bank transfers may take 2–3 business days”)
- If you support both bank and online payments, list them both for flexibility
- Follow up with clients manually to confirm receipt if needed